
Use Google Docs in a Chrome web browse Archives

use Google Docs in a Chrome web browse Archives
Google Docs -
Lesson 4: Uploading Files to Google Drive
/en/googledocuments/creating-google-docs/content/
Uploading and syncing files
Google Drive makes it easy to store and access your files online in the cloud, allowing you to access them from any computer with an Internet connection. If you upload files from compatible programs like Microsoft Word or Excel, you can even edit them in Google Drive. Watch the video below to learn how to upload files to Google Drive.
Uploading files to Google Drive
Google Drive gives you 15 gigabytes (15GB) of free storage space to upload files from your computer and store them in the cloud. There are two main types of files you can store on your Google Drive:
- Files you can edit, like Microsoft Office files, PDFs, and other text-based files
- Files you cannot edit, like music, videos, compressed archives (.zip files), and most other files
Once you upload a file—no matter what type of file it is—you'll be able to manage, organize, share, and access it from anywhere. And because the files on Google Drive are synced across your devices, you'll always see the most recent version of a file.
You can also preview many different file types, even if you don't have the software required for that file on your computer. For example, you can use Google Drive to preview a Photoshop file, even if Photoshop is not installed on your current computer.
Converting files to Google Drive formats
If you are uploading files you plan to edit online, you will need to convert them to Google Drive format. Converting allows you to edit a file and collaborate with others easily. Only certain file types—like Microsoft Office files and PDF documents—can be converted to Google Drive formats.
Unfortunately, this conversion isn't always perfect. Depending on the level of formatting used in the original document, the converted document could turn out looking quite different, as shown in the example below.
Conversion changes aren't always just cosmetic—you may even lose information from the original file. You should always review a file that's been converted before sharing it with others. Remember, you always have the option to store your files in their original file format if you'd prefer not to edit files online.
Uploading files and folders
It's easy to upload files from your computer to Google Drive. If you're using the Google Chrome web browser, you can even upload entirefolders.
To upload a file:
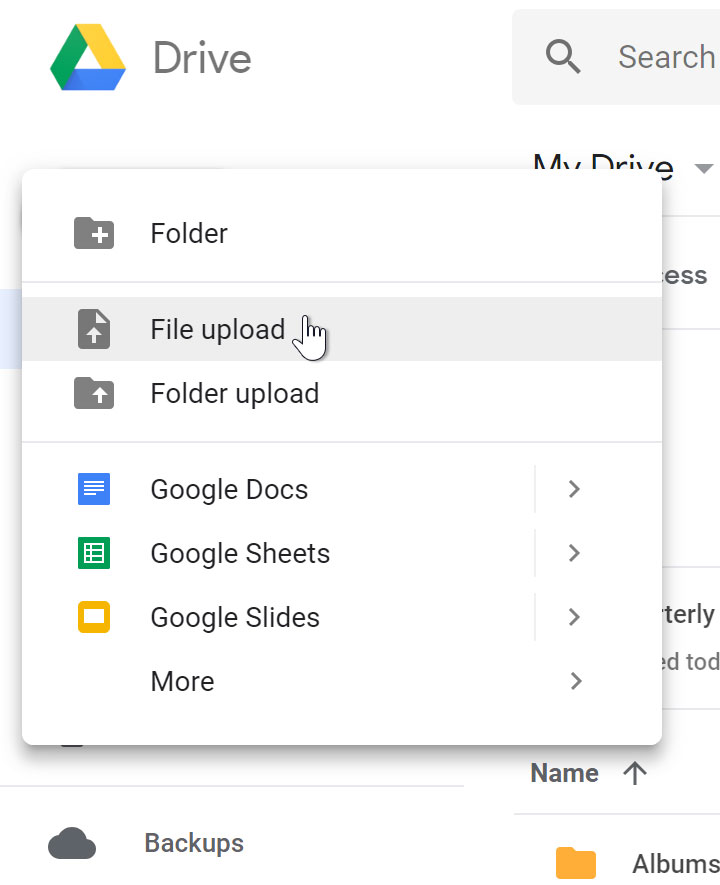
- From Google Drive, locate and select the New button, then select File upload.
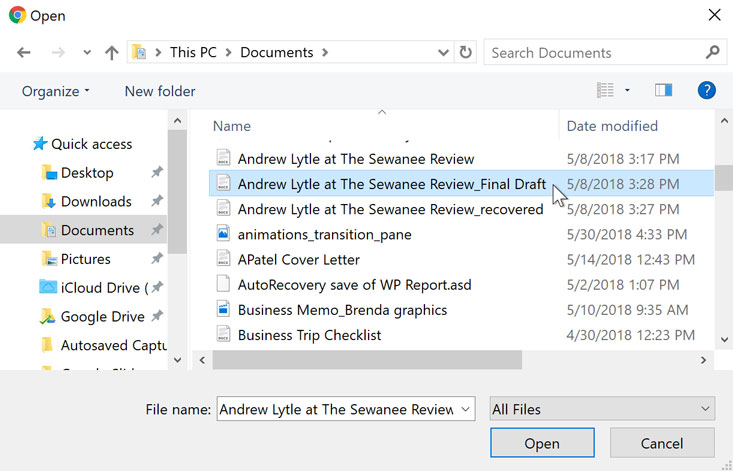
- Locate and select the file(s) you want to upload, then click Open.
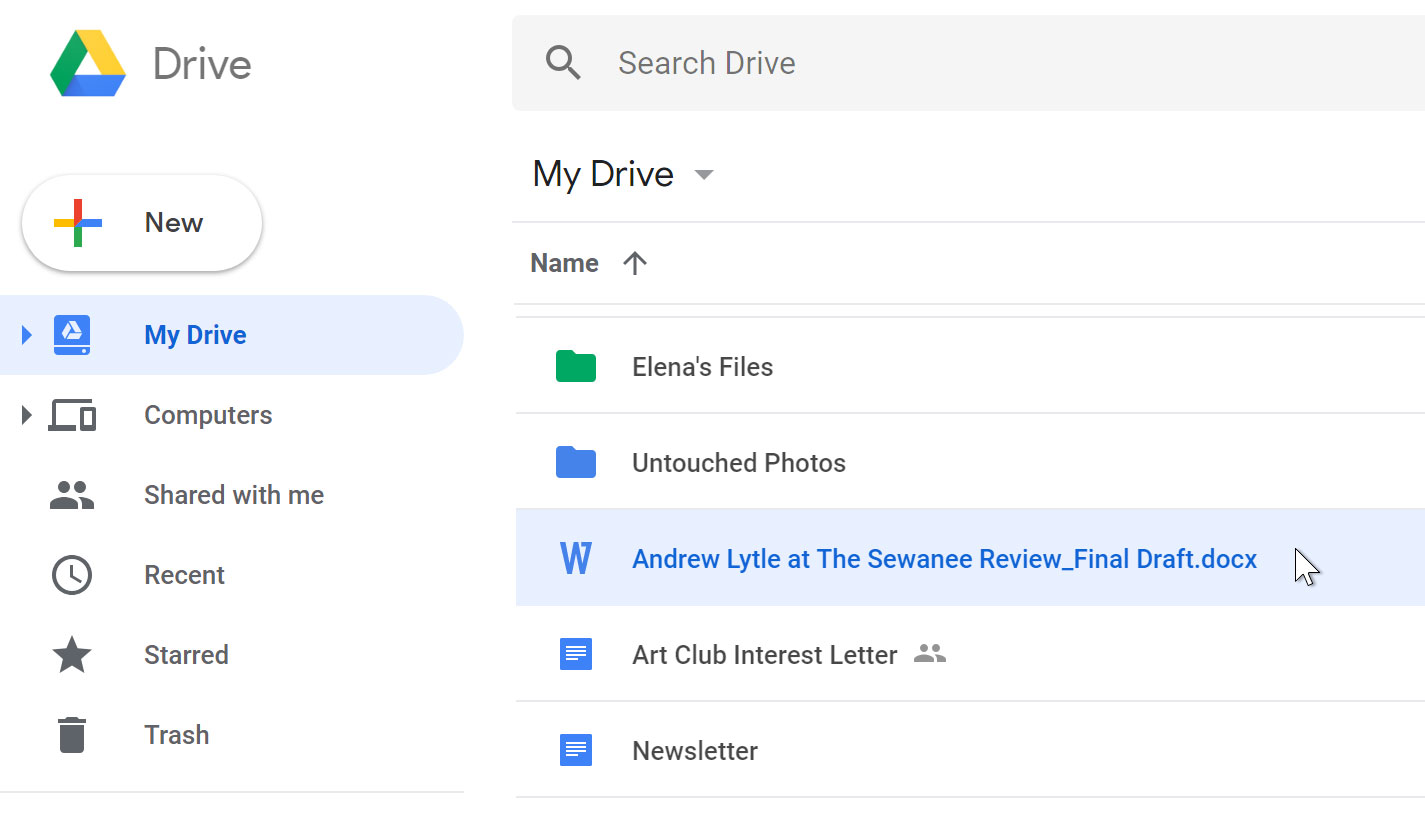
- The file(s) will be uploaded to your Google Drive.
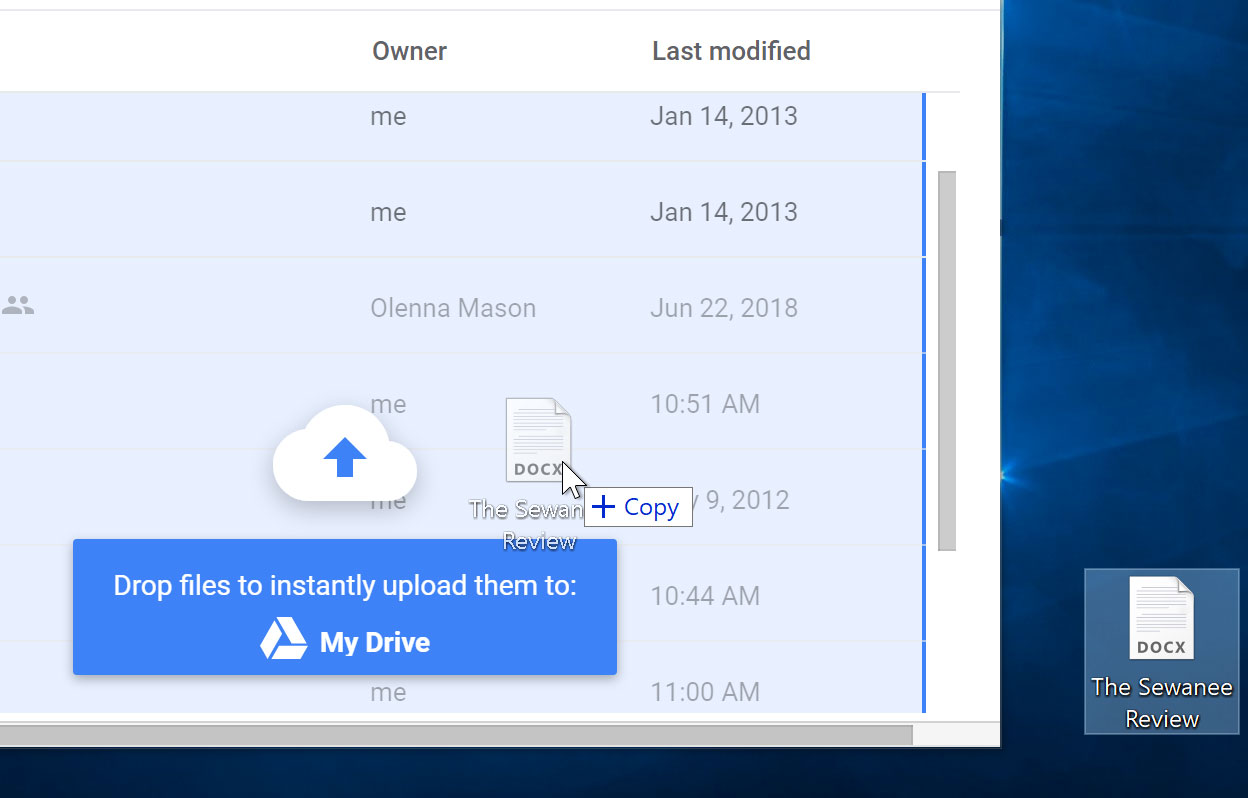
Depending on your browser and operating system, you may be able to upload files by clicking and dragging a file from your computer into your Google Drive.
To upload a folder:
Note: This feature is only available if you're accessing Google Drive through Google Chrome.
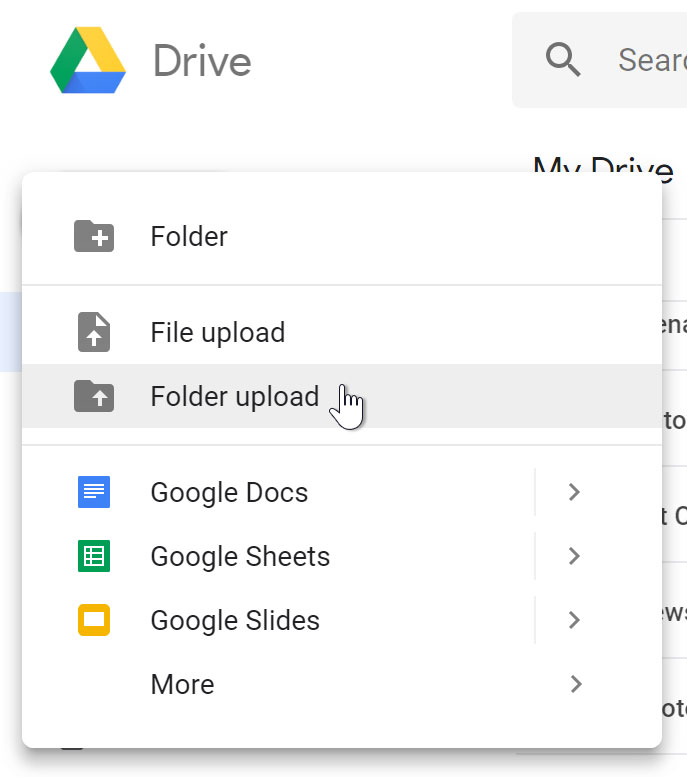
- Click the New button, then select Folder upload.
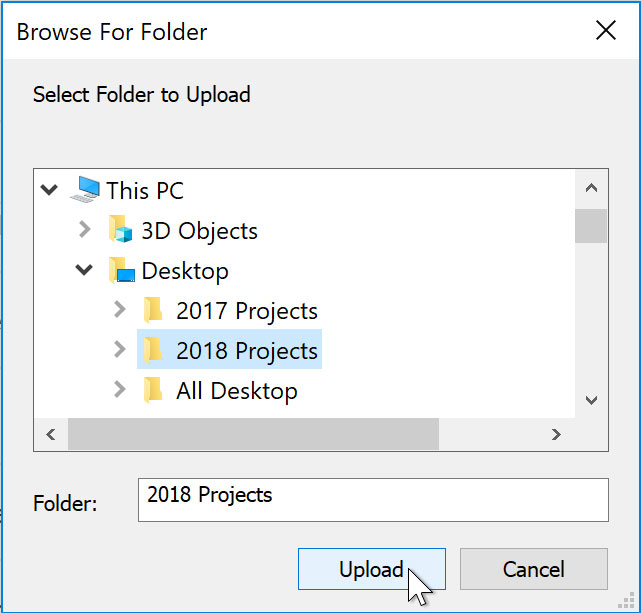
- Locate and select the folder you want to upload, then click OK.
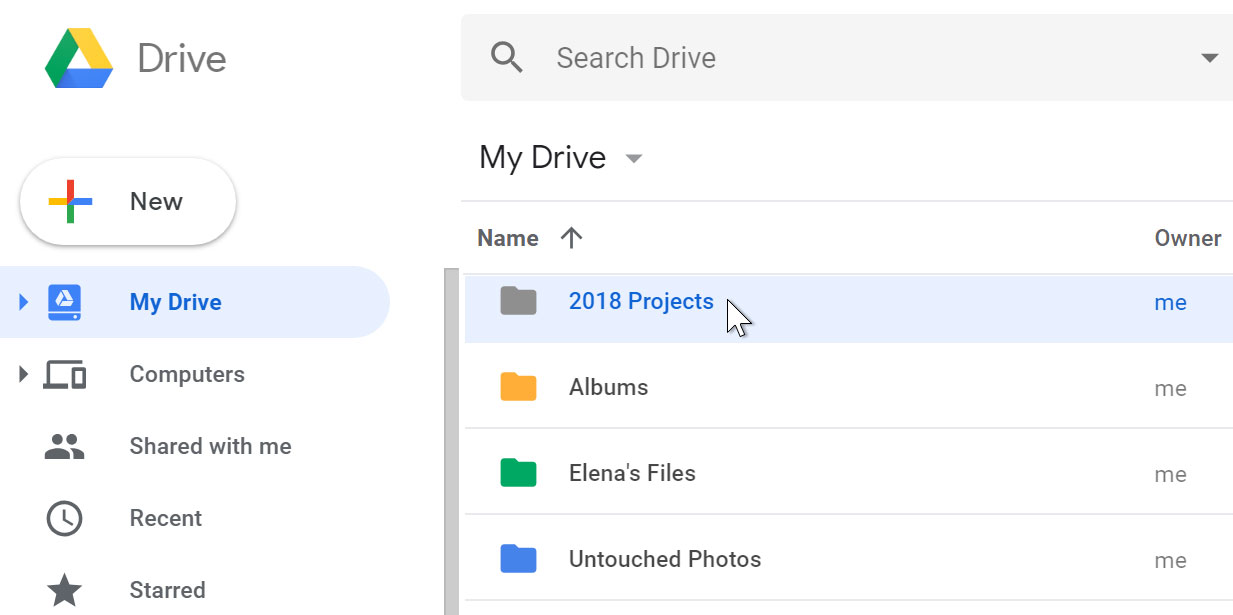
- The folder and the files within it will be uploaded to your Google Drive.
Converting files to Google Docs format
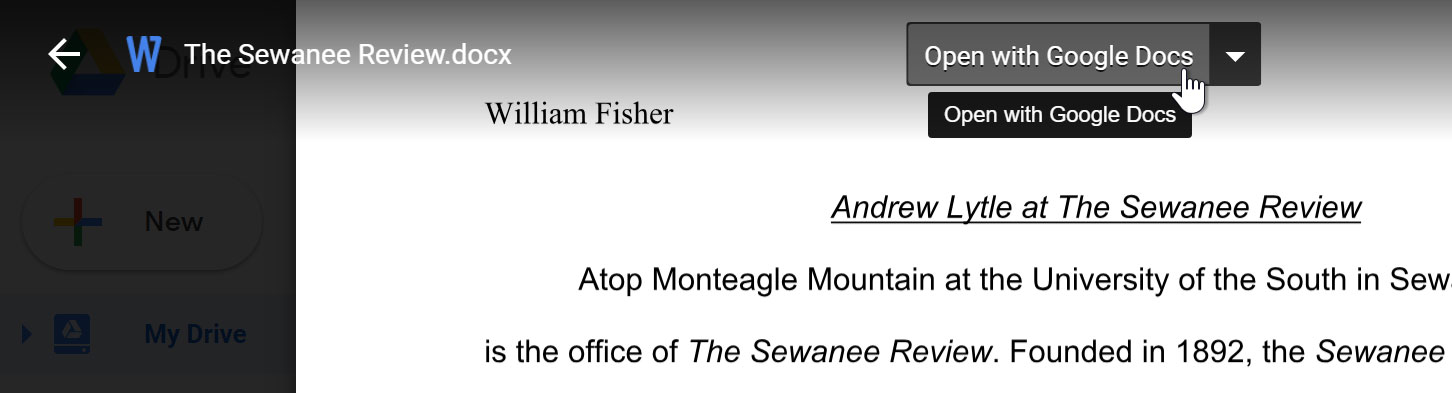
When you upload certain types of files—such as Microsoft Office files or PDF documents—you'll only be able to view those files. If you want to edit these types of files in Google Drive, you'll need to convert them to Google Docs format.
To convert a file:
- Locate and double-click the file you want to edit.
- A preview of the file will appear. Select Open at the top of the screen.
- The file will be converted to a Google document and appear in a new tab.
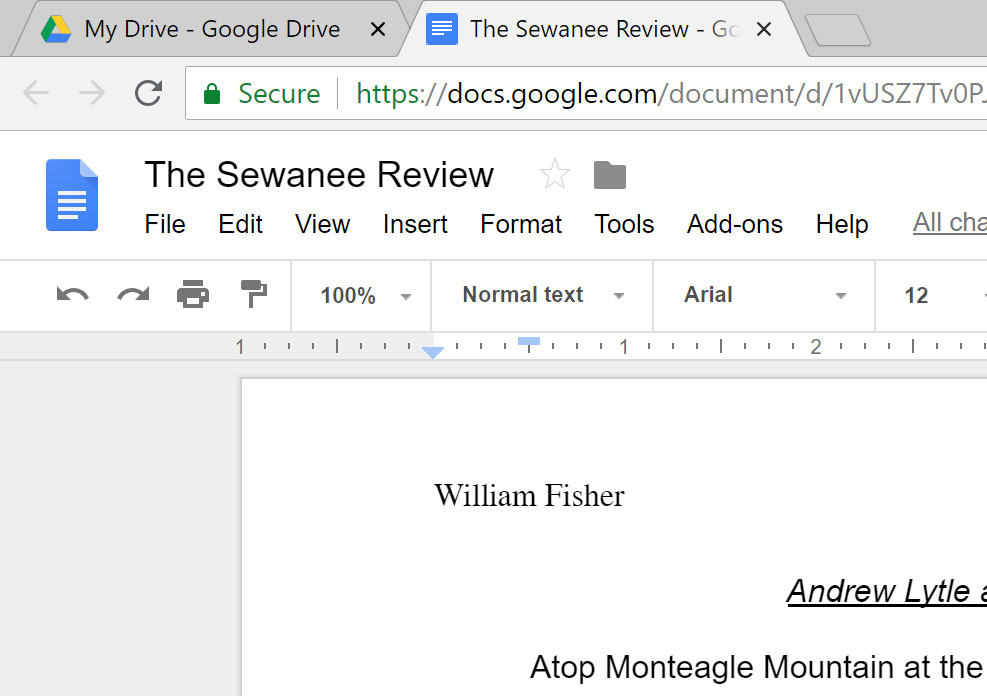
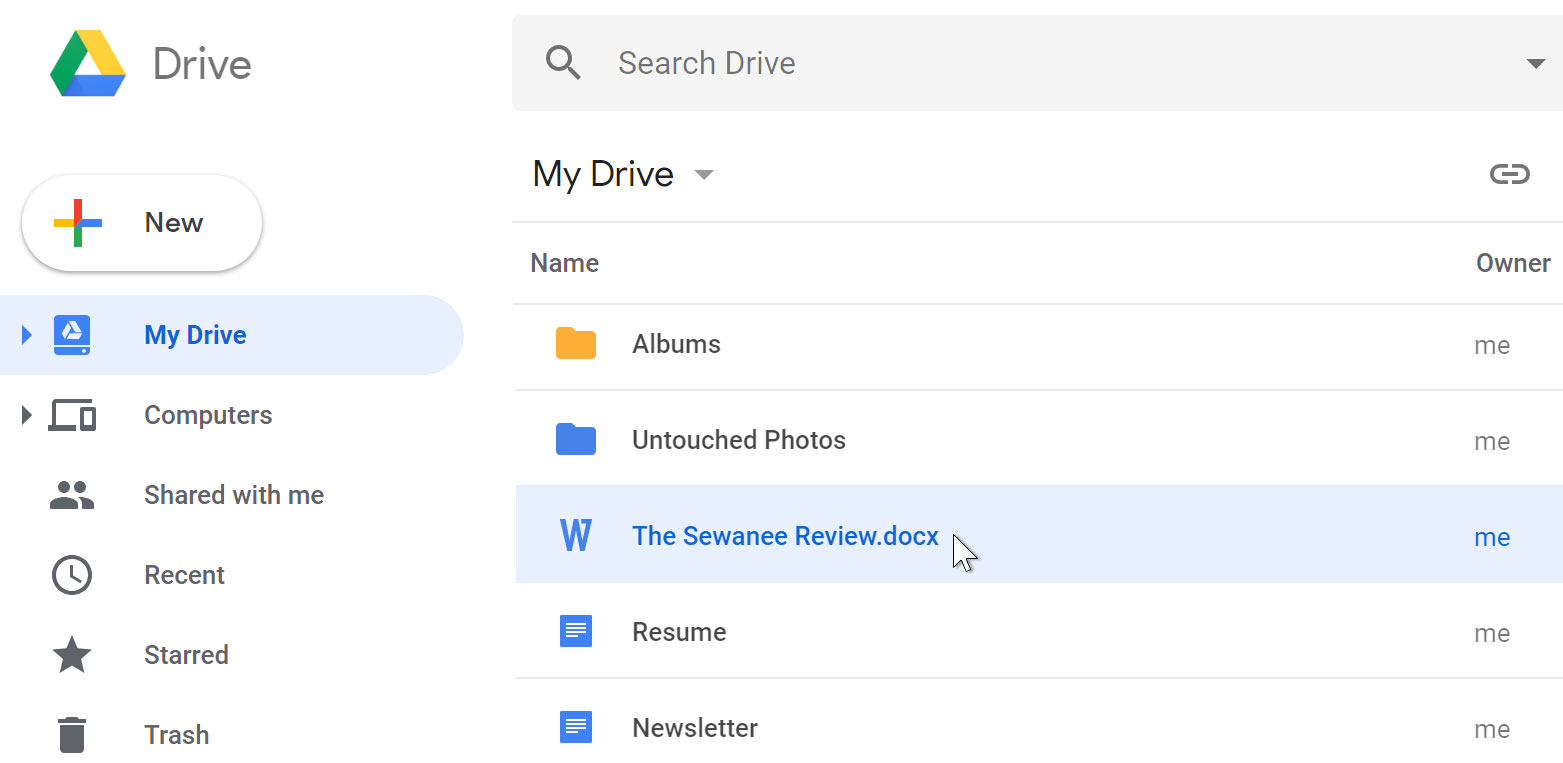
- If you go back to your Google Drive, you'll see that there are now two copies of the file: the original file and the new version in Google Docs format.

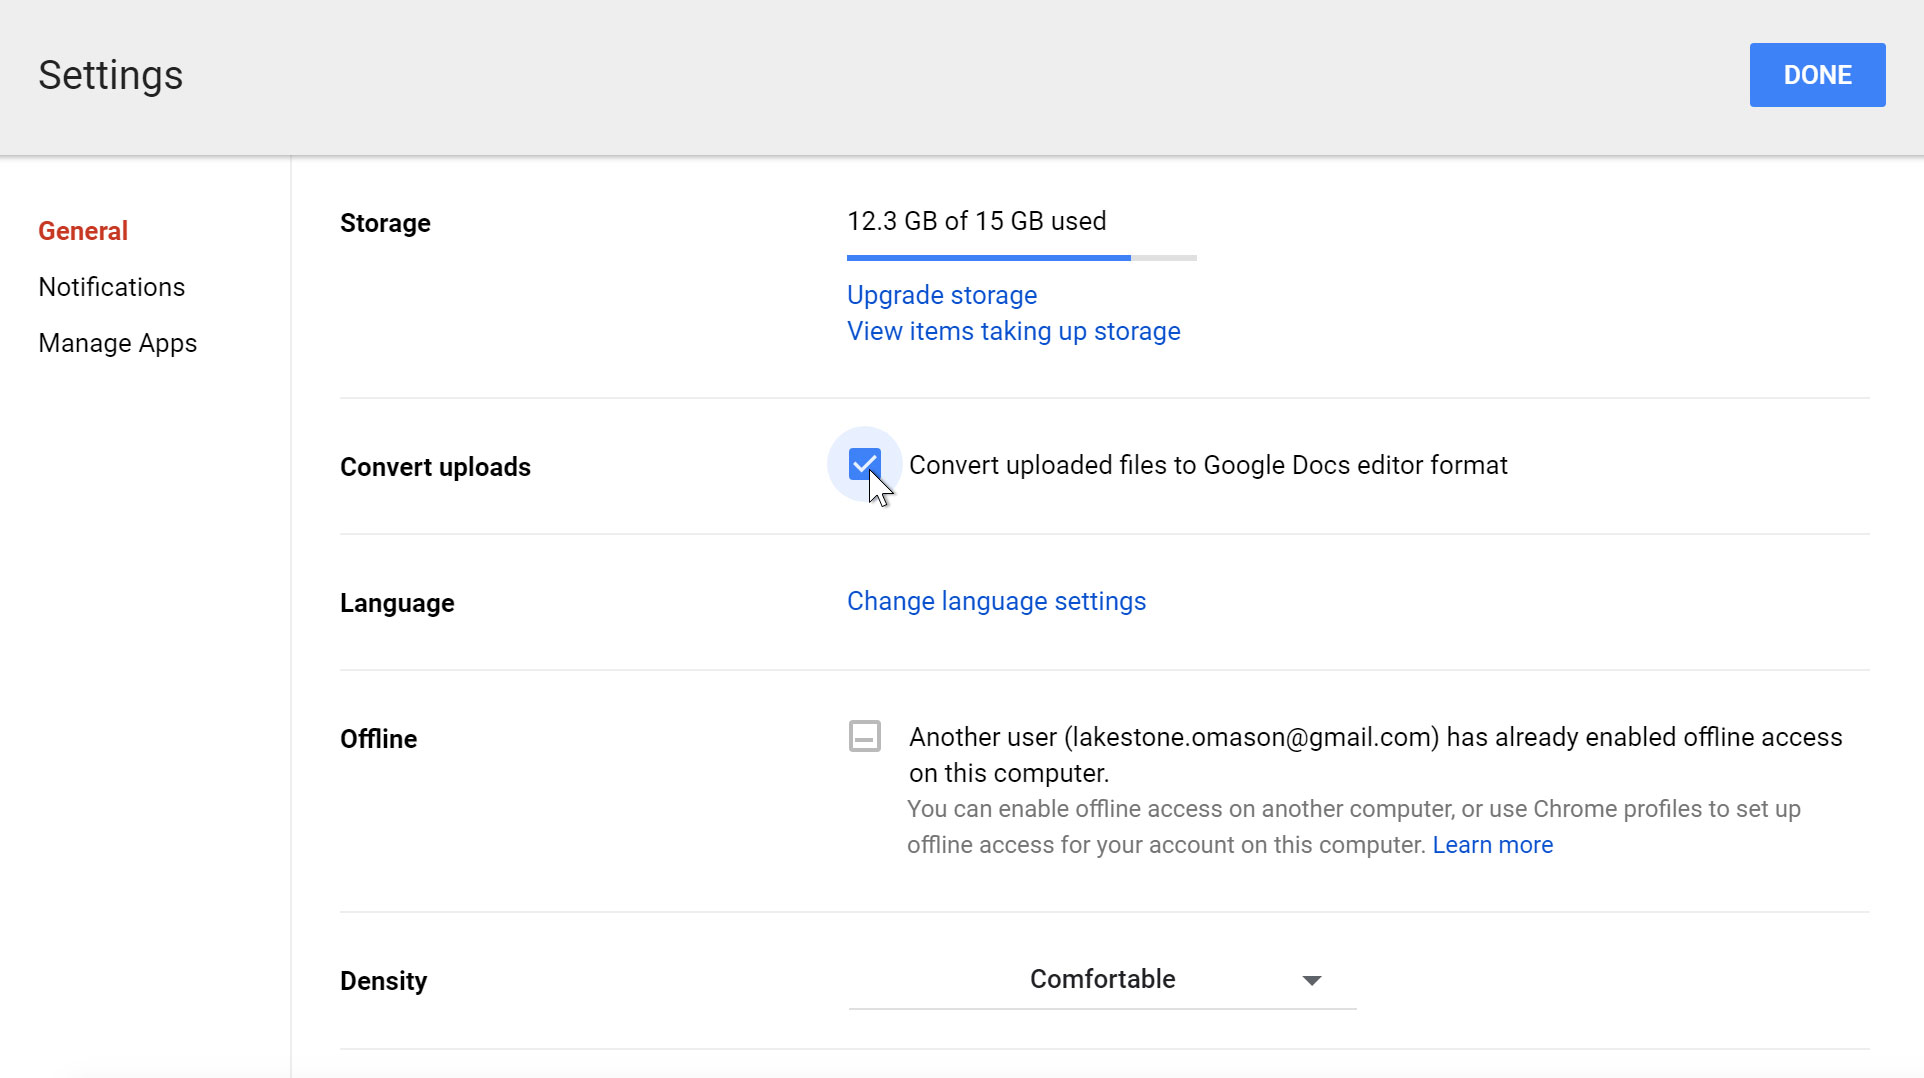
You can set Google Drive to convert your files automatically when you upload them. Click the gear icon, select Settings, then check the box next to Convert uploads.
Challenge!
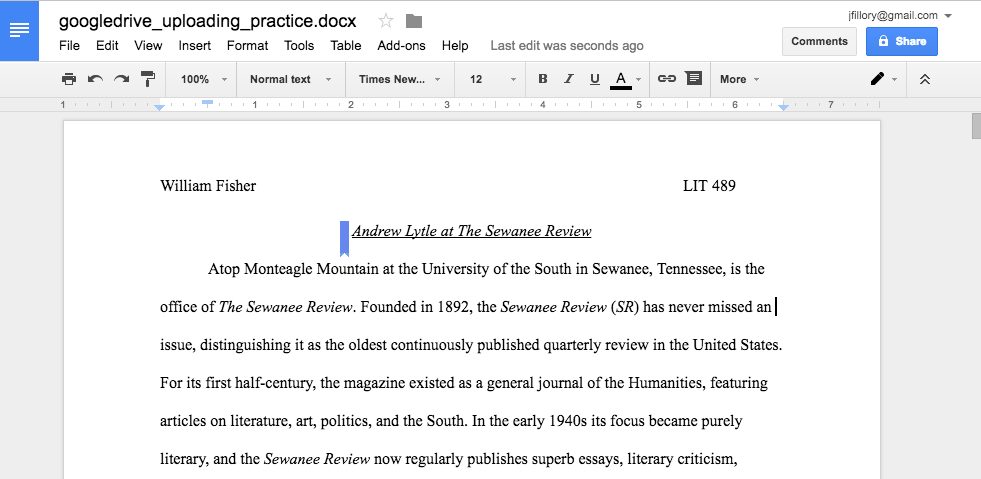
- Open Google Drive and upload a Microsoft Office file. If you don't have an Office file on your computer, you can download a copy of our example.
- Convert your file to a Google document.
- If you used our example file, your screen should look something like this:
/en/googledocuments/managing-your-files/content/
www.makeuseof.com
Wherever you are, you need a tool that can unzip compressed files. ZIP files are, after all, the digital couriers of the web -- second only to PDFs when it comes to sharing files.
On the desktop, you have utilities like WinZip and 7-Zip. But what if the ZIP is on Google Drive?
Working With ZIP Files in the Cloud
Imagine someone sent you an archived set of documents or photos in an email. Or shared a compressed ZIP file from a cloud folder. You can take the "normal" route and download it to your desktop, decompress the file, and then work with the contents.
Or you could do this all in the Google Drive folder with ZIP Extractor.
ZIP Extractor is a Chrome extension that extracts files from a ZIP archive in Google Drive. This extension can be an invaluable time-saver if you do a lot of cloud work and want to bypass the inconvenience of unzipping.
Install the Chrome extension from the Chrome Web Store. Or open your Google Drive account > New > More > Connect more apps. Search for ZIP Extractor and install it.
Now, you can select any archived file in Google Drive for extraction. Select the file and right-click to Open with the ZIP Extractor for ZIP files stored in Drive. On first use, the extension will ask you to authorize ZIP Extractor to access to Google Drive. After that, the unzip operation takes a couple of steps:
- The ZIP Extractor screen gives you the option to select the files to extract. By default, all files are selected.
- Choose Extract Now to extract into a new folder inside the current folder. You can change the destination folder.
- The extracted file is saved in a folder with the same name as the ZIP file.
Use the ZIP Extractor interface to view the extracted file, share the file, or extract another file. Now, you can work with the extracted files in Google Drive. Do remember that the decompress occurs in the cloud, so the strength of your bandwidth determines the speed of the process.
Take Care of Unzip Operations in the Cloud
ZIP Extractor is a simple but capable extension that extends the utility of your Drive. Yes, there are some small gaps -- for instance, it does not directly give you the option to directly download the unzipped files to your desktop -- but that's only a small itch.
Looking for more Google Drive tips? Check out these Google Drive tools and these tips for working with PDF files on Google Drive to get more out of the platform.
Do you work with a lot of compressed files in the cloud? Does ZIP Extractor work as a time saver for you?
Users of Google Meet are going to notice a very familiar interface on Android and iOS.

Saikat Basu is the Deputy Editor for Internet, Windows, and Productivity. After removing the grime of an MBA and a ten year long marketing career, he is now passionate about helping others improve their storytelling skills. He looks out for the missing Oxford comma and hates bad screenshots. But Photography, Photoshop, and Productivity ideas soothe his soul.
Subscribe To Our Newsletter
Join our newsletter for tech tips, reviews, free ebooks, and exclusive deals!
One More Step…!
Please confirm your email address in the email we just sent you.
How to Download Files and Webpages Directly to Google Drive in Chrome
We’ve all downloaded files from the web to our computer. However, if you’d rather download files directly to your Google Drive account, there’s an extension for Google Chrome that allows you to do just that.
Google’s Save to Google Drive extension allows you to save downloaded files directly to your Google Drive account, as well as save webpages to Google Drive as images, HTML files, or even Google documents. If you’re using the Google Drive desktop client for Windows or macOS, you can save downloaded files directly to your local Google Drive folder and they will be uploaded to your Google Drive account automatically. However, using the Google Drive client uses space on your computer, which isn’t ideal if you’re low on space. The Save to Google Drive extension can also be useful If you’re using Ubuntu Linux, which does not have an official Google Drive client.
RELATED:How to Sync Your Desktop PC with Google Drive (and Google Photos)
NOTE: The Save to Google Drive extension saves files to the Google account you are signed in to in Chrome. So, switch to the Google Chrome profile that corresponds to the Google Drive account you want to save files to before using this extension.
We’ll show you how to install, set up, and use the Save to Google Drive extension in Chrome for Windows, but it works the same way on Chrome for macOS and for most common Linux distributions, such as Ubuntu.
Install and Set Up the Save to Google Drive Extension
To install the extension, visit the Save to Google Drive extension page in Chrome and click “Add to Chrome”.

A confirmation dialog box displays asking if you want to add Save to Google Drive. Click “Add extension”.

A button for the Save to Google Drive extension is added to the toolbar to the right of the address bar.

Before using the extension, we’ll set up the options for it. To do this, right-click on the Save to Google Drive button on the toolbar and select “Options” from the popup menu.

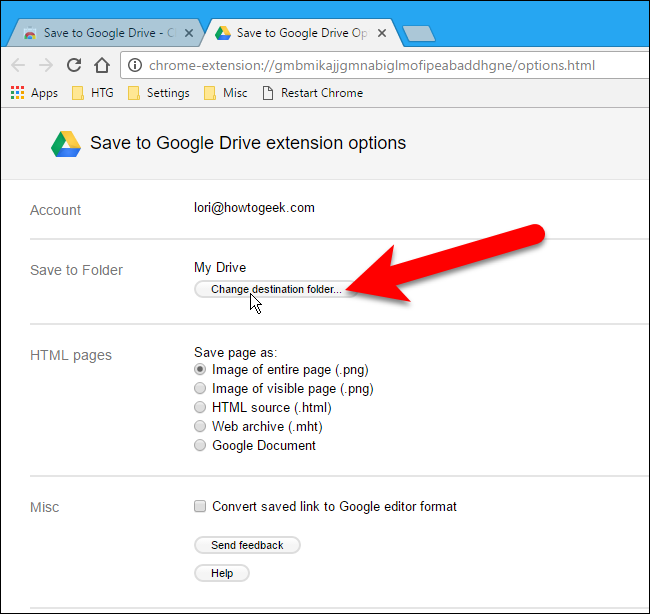
The options for the extension display on a new tab. By default, the extension is set to save files to the main My Drive folder in your Google Drive account. To change this, click “Change destination folder” in the Save to Folder section.
On the Select a Save to Folder dialog box, navigate to and select the folder in which you want to save files by default and click “Select”.
NOTE: You can still change the Save to Folder for each file you save to Google Drive. If you want to save most files to the same location, this setting makes it quicker to save files to your predefined location.

The Save to Google Drive extension also allows you to save a webpage as an image of the entire page (default), an image of the visible page, raw HTML source, a web archive (MHTML), or even as a Google Document. In the HTML pages section, select the format you want to use when saving webpages. If you’re downloading Microsoft Office files or comma-separated files, you can automatically convert these files to Google Docs format, by checking the “Convert saved link to Google editor format” box.

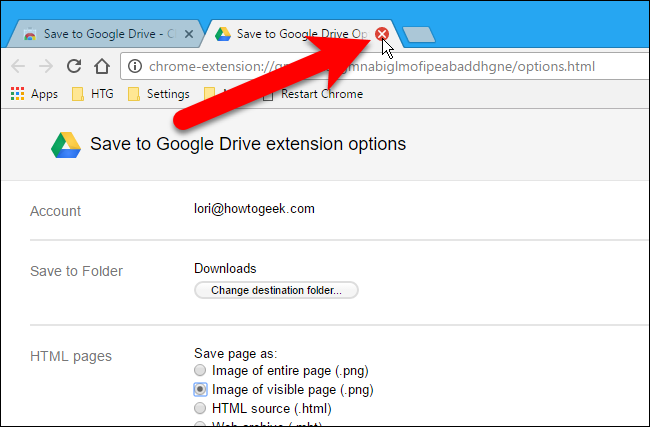
Once you’ve made your selections, click the “X” on the Options tab to close it.
Download a File Directly to Google Drive
To save a downloadable file to your Google Drive account, right-click on a download link and select “Save Link to Google Drive” from the popup menu.

The first time you save a file or webpage to Google Drive using the extension, a dialog box displays asking you to allow the extension to access and use the information listed. Click “Allow”.

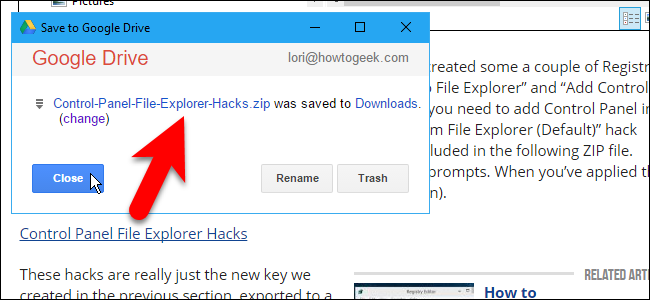
The Save to Google Drive dialog box displays and the downloaded file is saved to your Google Drive account either to the main My Drive location or to the folder you specified.

You can also change the name of the downloaded file to whatever you want by clicking “Rename”.

Change the file name in the Rename box and click “Apply”.

Click “Close” to close the Save to Google Drive dialog box.

The webpage file is saved to your Google Drive account.

Save a Webpage Directly to Google Drive
To save a webpage to your Google Drive account in the format you chose on the Options page, click the “Save to Google Drive” button on the toolbar.

The webpage image, HTML, or Google Document file is uploaded to your Google Drive account either to the main My Drive location or to the folder you specified.

Once the file is uploaded, you can click “Rename” if you want to change the file name.

Change the name of the file (leaving the file extension alone) in the Rename box and click “Apply”.

You can change the location where the file will be saved in your Google Drive account by clicking the “(change)” link, which opens the Options tab again. If you click “(change)”, the Save to Google Drive dialog box automatically closes. If you’re not changing the location, click “Close”.

The webpage file is saved to your Google Drive account.

Due to security restrictions, when saving webpages using the Save to Google Drive extension, you cannot save chrome:// pages, such as chrome://extensions or chrome://flags, or Chrome Web Store pages.
 Lori Kaufman
Lori Kaufman is a technology expert with 25 years of experience. She's been a senior technical writer, worked as a programmer, and has even run her own multi-location business.
Read Full Bio »
What’s New in the use Google Docs in a Chrome web browse Archives?
Screen Shot

System Requirements for Use Google Docs in a Chrome web browse Archives
- First, download the Use Google Docs in a Chrome web browse Archives
-
You can download its setup from given links:

use Google Docs in a Chrome web browse Archives & Kali Software Crack

use Google Docs in a Chrome web browse Archives& Key Download
