
Genymotion Serial Number Archives

Genymotion Serial Number Archives
Mac & Apple Devices - EveryMac.com's Ultimate Mac Lookup
Lookup Mac, iPod, iPhone, iPad, Apple Watch, Apple TV and other Apple devices by Apple Order Number, Model Number, EMC Number, Model Identifier, and Serial Number as well as Intel processor number to check its specs and other details.
Find EveryMac.com useful? Please Bookmark & Share.
For a Serial Number lookup, be sure to enter the entire serial number.
Need help? See Mac Identification or iPod, iPhone & iPad Identification. Want to search the entire site in natural language? Use Site Search instead.
<< Systems (Main)
EveryMac.com is provided "as is" without warranty of any kind whatsoever. EveryMac.com, and the author thereof, shall not be held responsible or liable, under any circumstances, for any damages resulting from the use or inability to use the information within. For complete disclaimer and copyright information please read and understand the Terms of Use and the Privacy Policy before using EveryMac.com. Use of any content or images without expressed permission is not allowed, although links to any page are welcomed and appreciated.
Источник: [https://torrent-igruha.org/3551-portal.html]
Managing Virtual Devices with the Android Device Manager
This article explains how to use the Android Device Manager to create and configure Android Virtual Devices (AVDs) that emulate physical Android devices. You can use these virtual devices to run and test your app without having to rely on a physical device.
After you have verified that hardware acceleration is enabled (as described in Hardware Acceleration for Emulator Performance), the next step is to use the Android Device Manager (also referred to as the Xamarin Android Device Manager) to create virtual devices that you can use to test and debug your app.
Android Device Manager on Windows
This article explains how to use the Android Device Manager to create, duplicate, customize, and launch Android virtual devices.
You use the Android Device Manager to create and configure Android Virtual Devices (AVDs) that run in the Android Emulator. Each AVD is an emulator configuration that simulates a physical Android device. This makes it possible to run and test your app in a variety of configurations that simulate different physical Android devices.
Requirements
To use the Android Device Manager, you will need the following items:
Visual Studio 2019 Community, Professional, or Enterprise.
OR Visual Studio 2017 version 15.8 or later is required. Visual Studio Community, Professional, and Enterprise editions are supported.
Visual Studio Tools for Xamarin version 4.9 or later.
The Android SDK must be installed (see Setting up the Android SDK for Xamarin.Android). Be sure to install the Android SDK at its default location if it is not already installed: C:\Program Files (x86)\Android\android-sdk.
The following packages must be installed (via the Android SDK Manager):
- Android SDK Tools version 26.1.1 or later
- Android SDK Platform-Tools 27.0.1 or later
- Android SDK Build-Tools 27.0.3 or later
- Android Emulator 27.2.7 or later.
These packages should be displayed with Installed status as seen in the following screenshot:

Launching the Device Manager
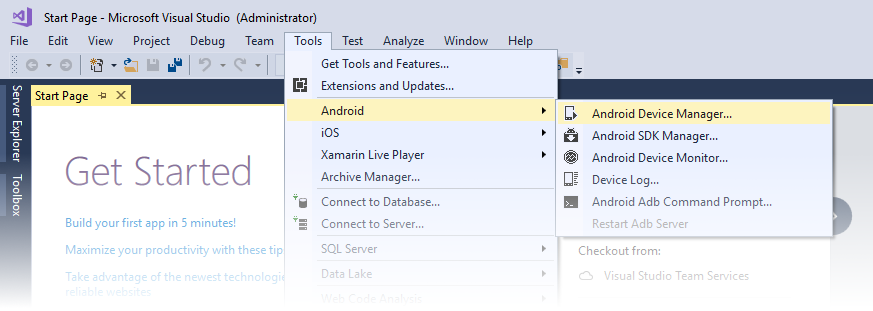
Launch the Android Device Manager from the Tools menu by clicking Tools > Android > Android Device Manager:
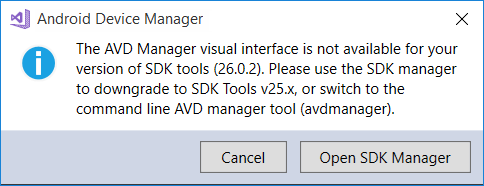
If the following error dialog is presented on launch, see the Troubleshooting section for workaround instructions:
Main Screen
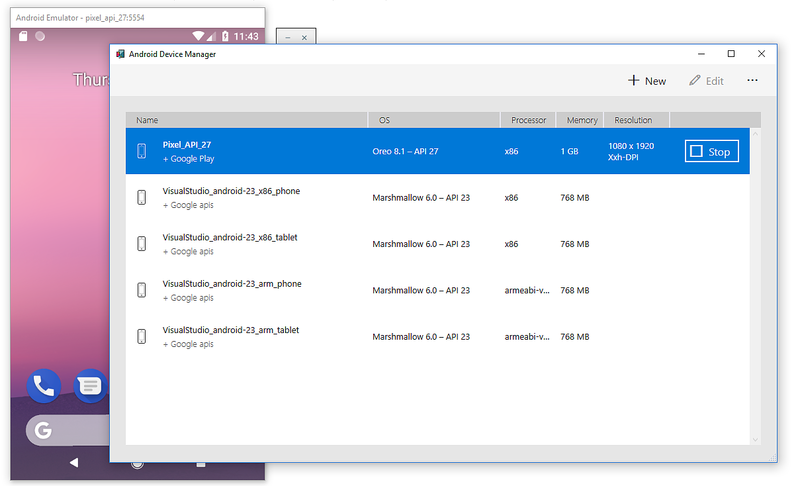
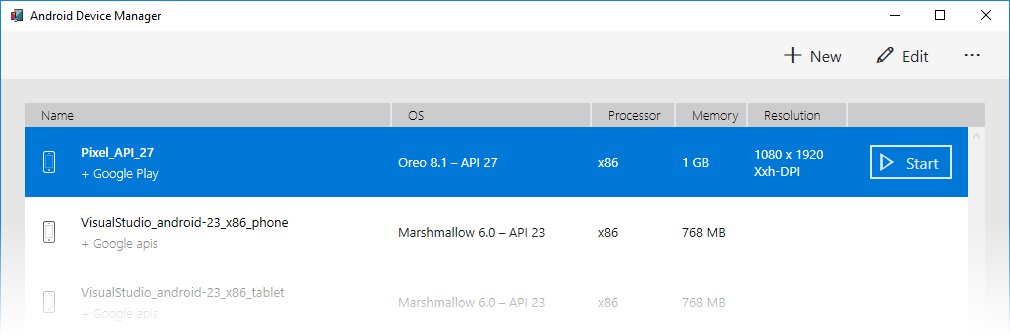
When you first launch the Android Device Manager, it presents a screen that displays all currently-configured virtual devices. For each virtual device, the Name, OS (Android Version), Processor, Memory size, and screen Resolution are displayed:
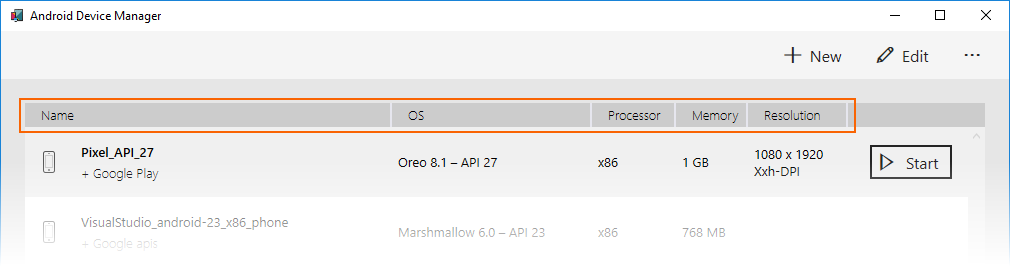
When you select a device in the list, the Start button appears on the right. You can click the Start button to launch the emulator with this virtual device:
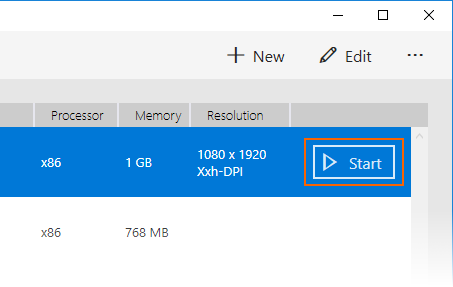
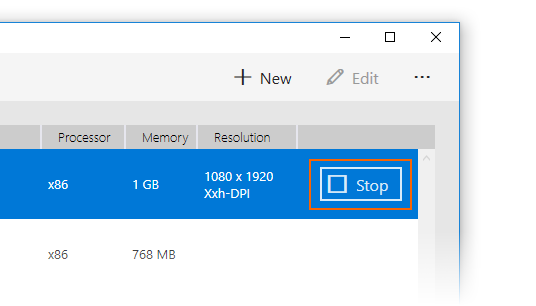
After the emulator starts with the selected virtual device, the Start button changes to a Stop button that you can use to halt the emulator:
New Device
To create a new device, click the New button (located in the upper right-hand area of the screen):
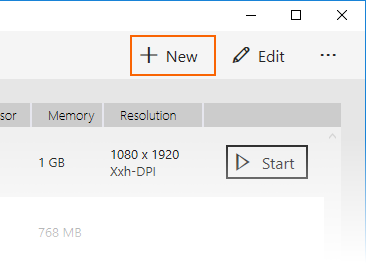
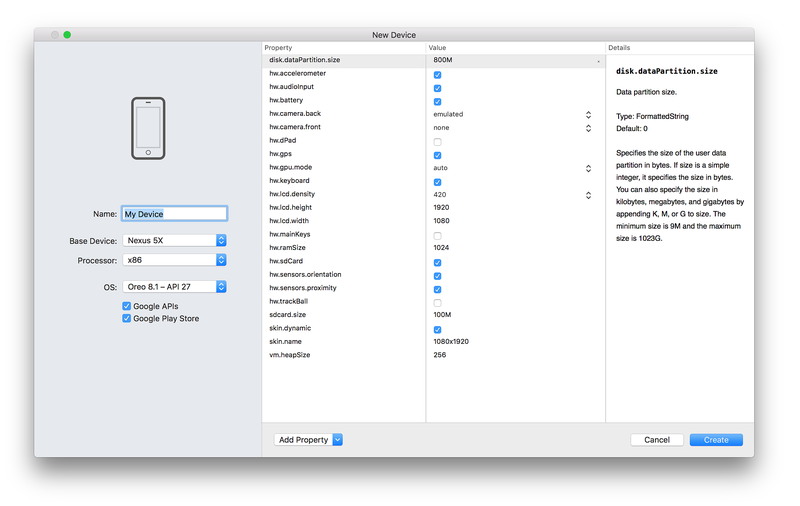
Clicking New launches the New Device screen:
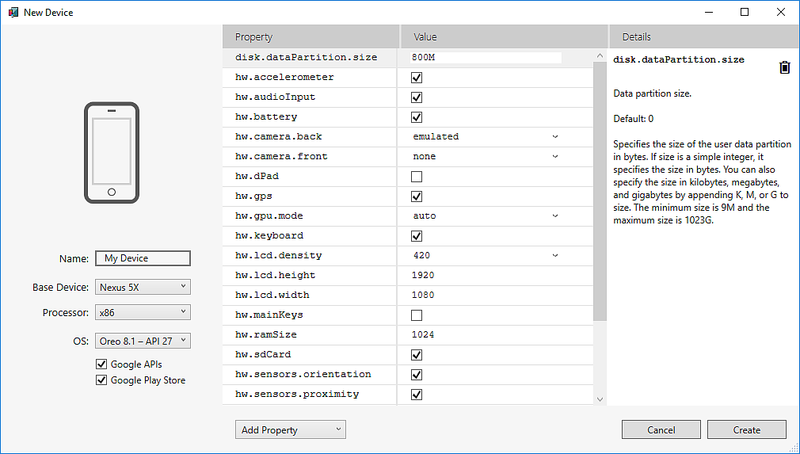
To configure a new device in the New Device screen, use the following steps:
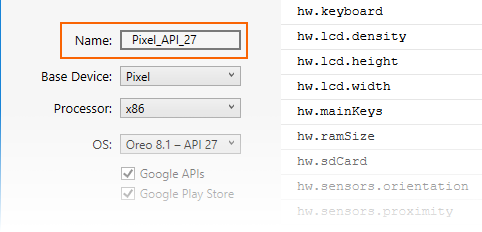
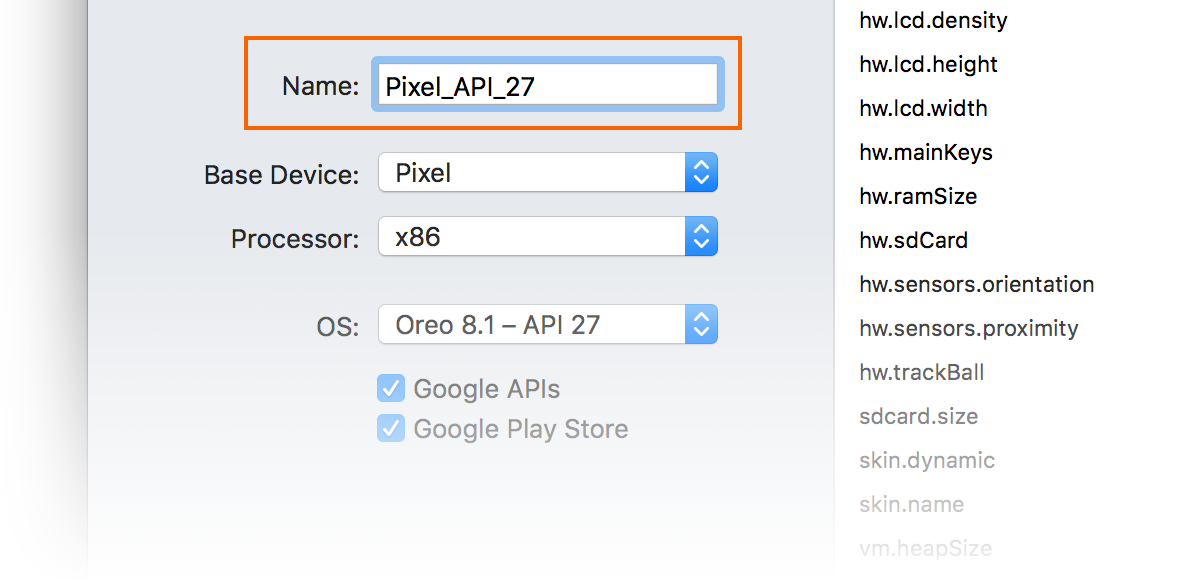
Give the device a new name. In the following example, the new device is named Pixel_API_27:
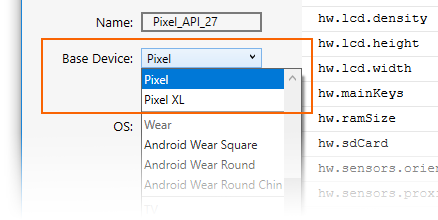
Select a physical device to emulate by clicking the Base Device pull-down menu:
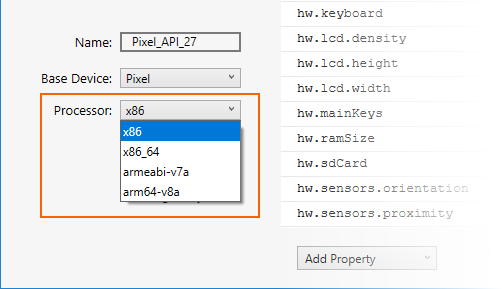
Select a processor type for this virtual device by clicking the Processor pull-down menu. Selecting x86 will provide the best performance because it enables the emulator to take advantage of hardware acceleration. The x86_64 option will also make use of hardware acceleration, but it runs slightly slower than x86 (x86_64 is normally used for testing 64-bit apps):
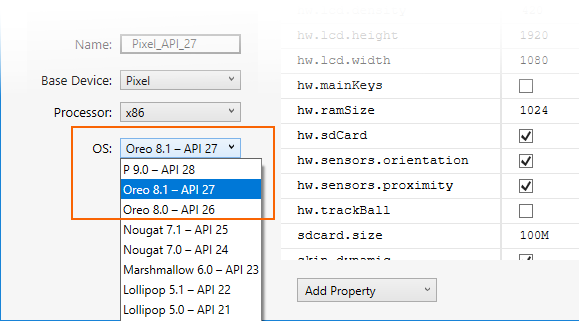
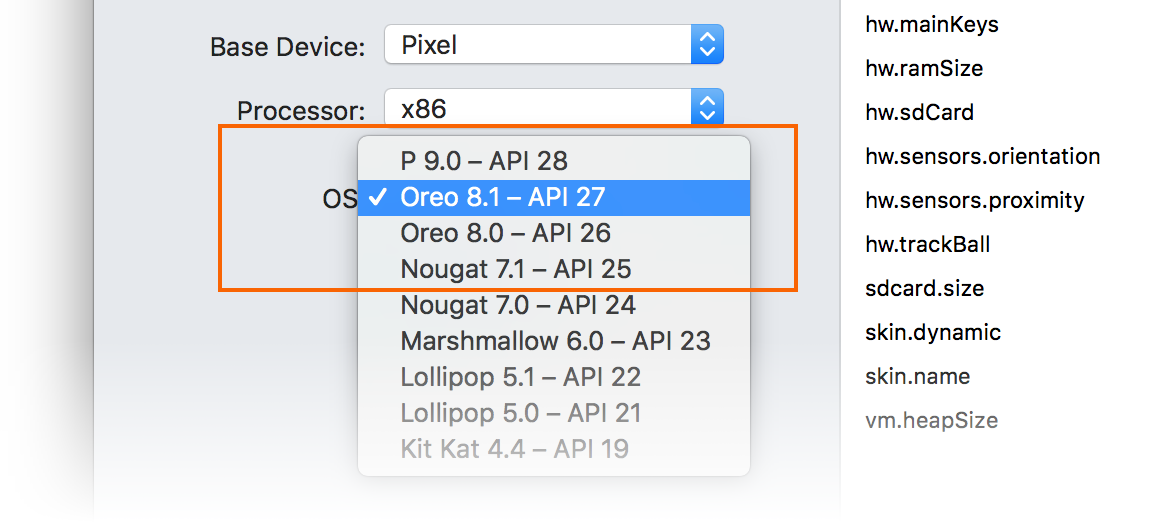
Select the Android version (API level) by clicking the OS pull-down menu. For example, select Oreo 8.1 - API 27 to create a virtual device for API level 27:
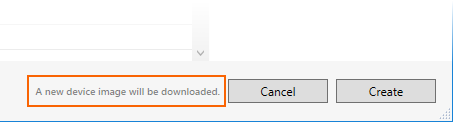
If you select an Android API level that has not yet been installed, the Device Manager will display A new device will be downloaded message at the bottom of the screen – it will download and install the necessary files as it creates the new virtual device:
If you want to include Google Play Services APIs in your virtual device, enable the Google APIs option. To include the Google Play Store app, enable the Google Play Store option:
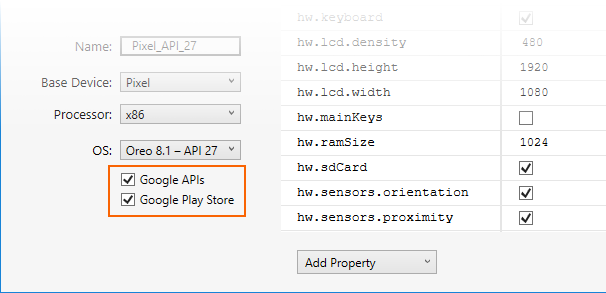
Note that Google Play Store images are available only for some base device types such as Pixel, Pixel 2, Nexus 5, and Nexus 5X.
Edit any properties that you need to modify. To make changes to properties, see Editing Android Virtual Device Properties.
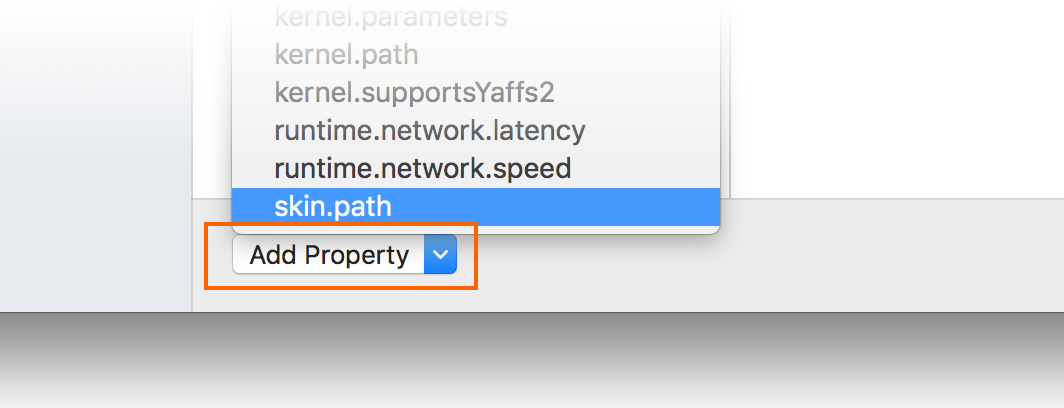
Add any additional properties that you need to explicitly set. The New Device screen lists only the most commonly-modified properties, but you can click the Add Property pull-down menu (at the bottom) to add additional properties:
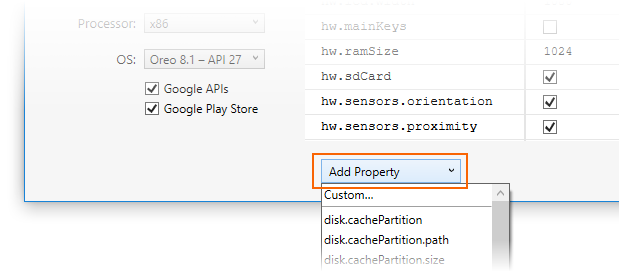
You can also define a custom property by selecting Custom... at the top of the property list.
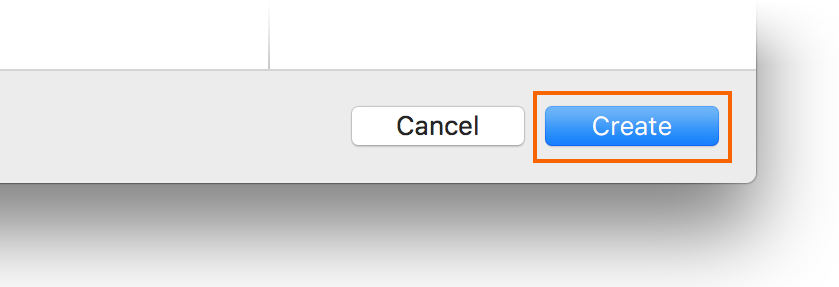
Click the Create button (lower right-hand corner) to create the new device:

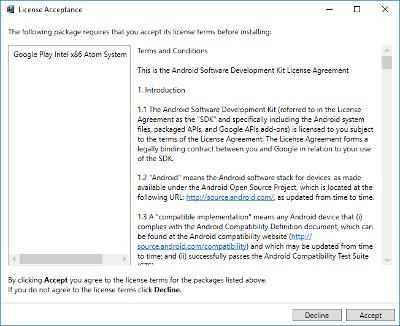
You might get a License Acceptance screen. Click Accept if you agree to the license terms:
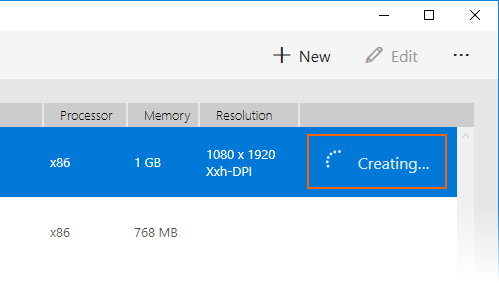
The Android Device Manager adds the new device to the list of installed virtual devices while displaying a Creating progress indicator during device creation:
When the creation process is complete, the new device is shown in the list of installed virtual devices with a Start button, ready to launch:
Edit Device
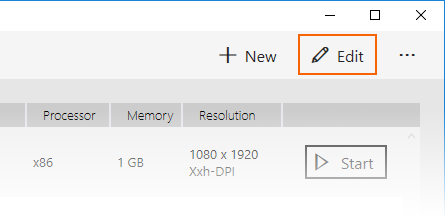
To edit an existing virtual device, select the device and click the Edit button (located in the upper right-hand corner of the screen):
Clicking Edit launches the Device Editor for the selected virtual device:
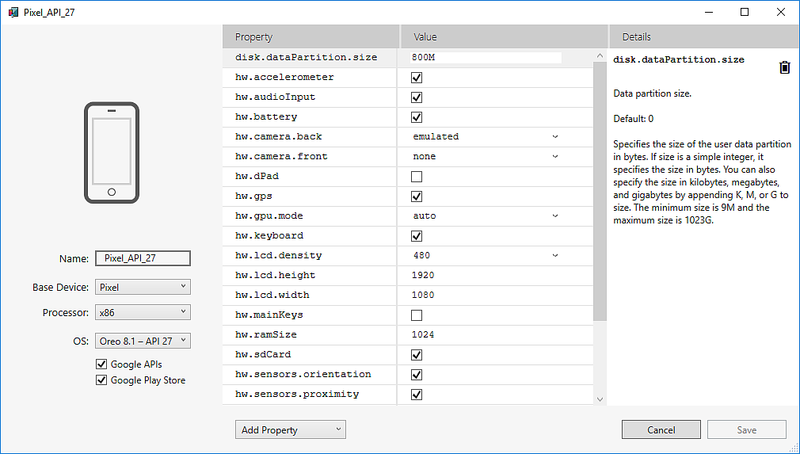
The Device Editor screen lists the properties of the virtual device under the Property column, with the corresponding values of each property in the Value column. When you select a property, a detailed description of that property is displayed on the right.
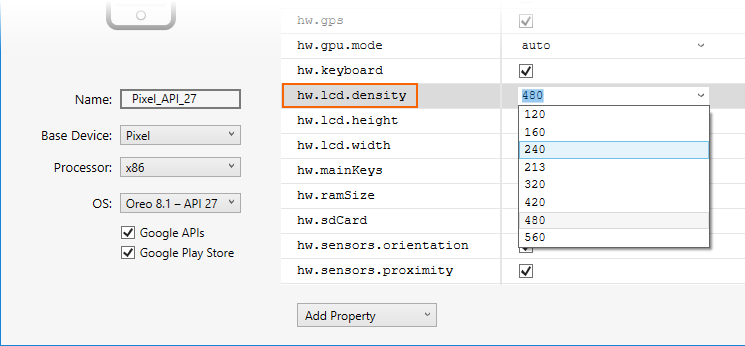
To change a property, edit its value in the Value column. For example, in the following screenshot the property is being changed from 480 to 240:
After you have made the necessary configuration changes, click the Save button. For more information about changing virtual device properties, see Editing Android Virtual Device Properties.
Additional Options
Additional options for working with devices are available from the Additional Options (…) pull-down menu in the upper right-hand corner:

The additional options menu contains the following items:
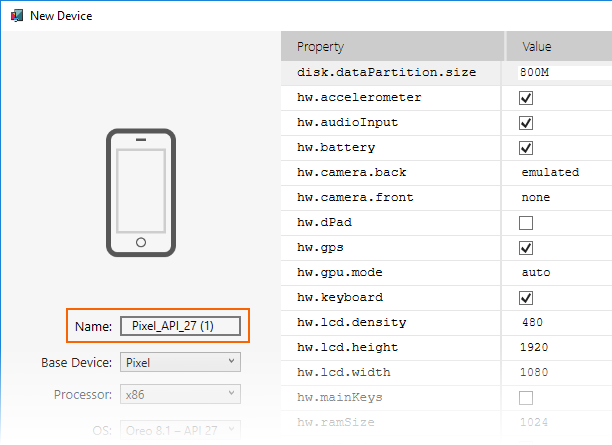
Duplicate and Edit – Duplicates the currently-selected device and opens it in the New Device screen with a different unique name. For example, selecting Pixel_API_27 and clicking Duplicate and Edit appends a counter to the name:
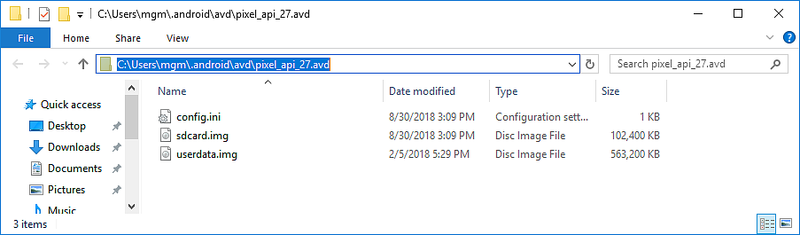
Reveal in Explorer – Opens a Windows Explorer window in the folder that holds the files for the virtual device. For example, selecting Pixel_API_27 and clicking Reveal in Explorer opens a window like the following example:
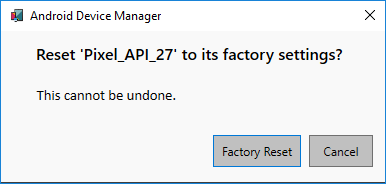
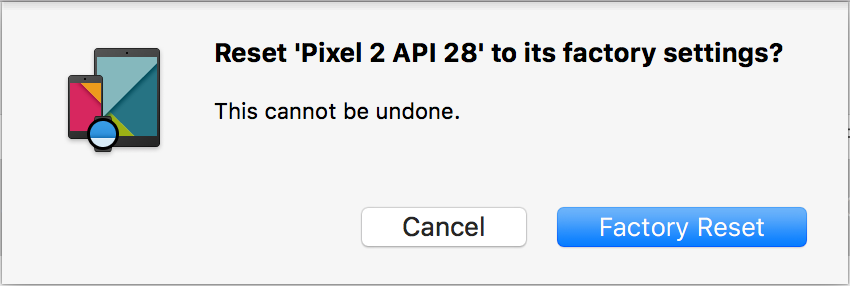
Factory Reset – Resets the selected device to its default settings, erasing any user changes made to the internal state of the device while it was running (this also erases the current Quick Boot snapshot, if any). This change does not alter modifications that you make to the virtual device during creation and editing. A dialog box will appear with the reminder that this reset cannot be undone. Click Factory Reset to confirm the reset:
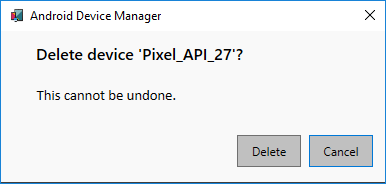
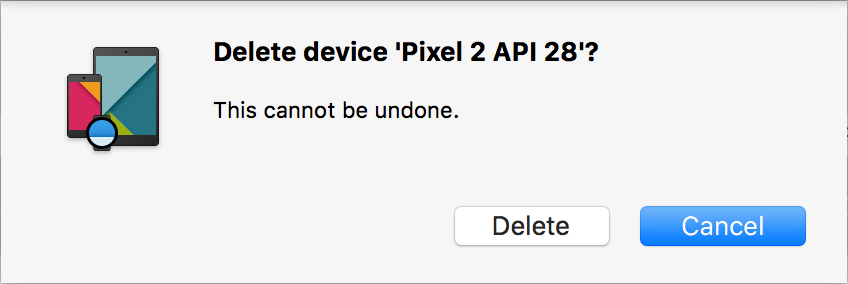
Delete – Permanently deletes the selected virtual device. A dialog box will appear with the reminder that deleting a device cannot be undone. Click Delete if you are certain that you want to delete the device.
Android Device Manager on macOS
This article explains how to use the Android Device Manager to create, duplicate, customize, and launch Android virtual devices.

Note
This guide applies only to Visual Studio for Mac. Xamarin Studio is incompatible with the Android Device Manager.
You use the Android Device Manager to create and configure Android Virtual Devices (AVDs) that run in the Android Emulator. Each AVD is an emulator configuration that simulates a physical Android device. This makes it possible to run and test your app in a variety of configurations that simulate different physical Android devices.
Requirements
To use the Android Device Manager, you will need the following items:
Visual Studio for Mac 7.6 or later.
The Android SDK must be installed (see Setting up the Android SDK for Xamarin.Android).
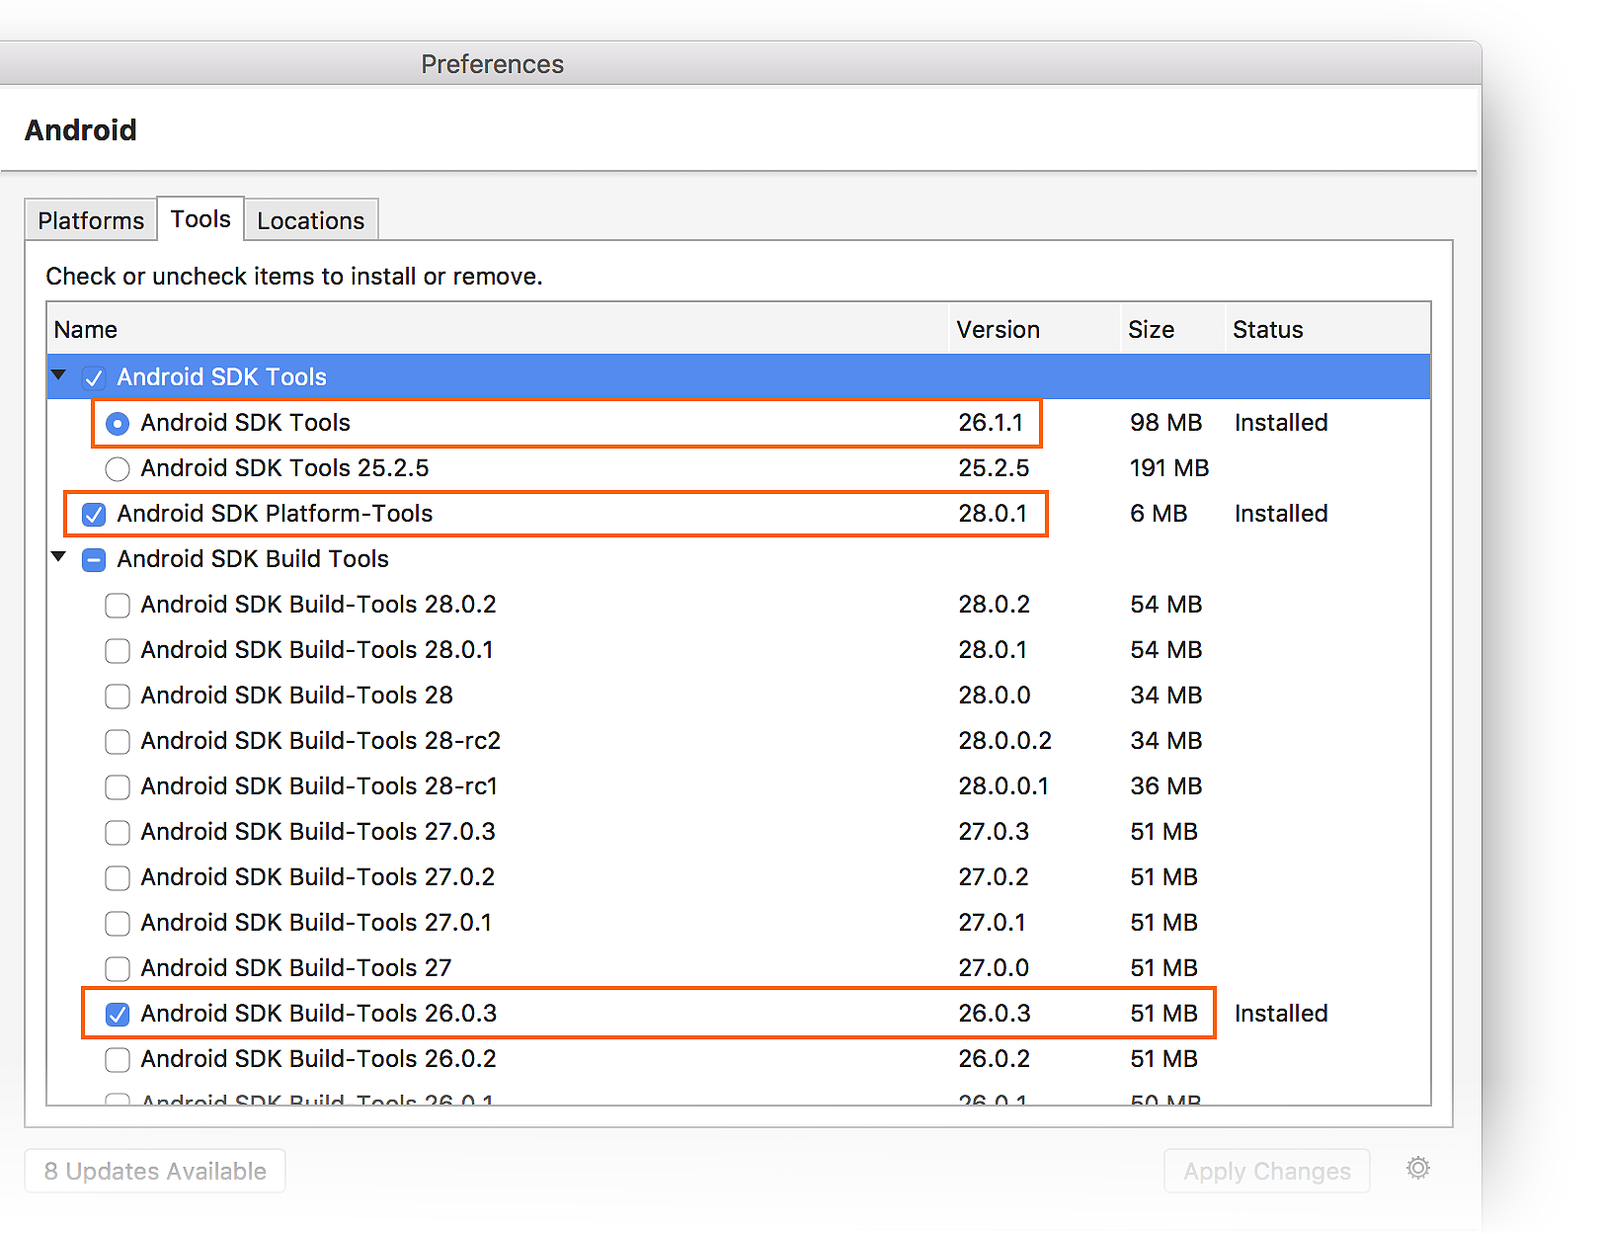
The following packages must be installed (via the Android SDK Manager):
- SDK tools version 26.1.1 or later
- Android SDK Platform-Tools 28.0.1 or later
- Android SDK Build-Tools 26.0.3 or later
These packages should be displayed with Installed status as seen in the following screenshot:
Launching the Device Manager
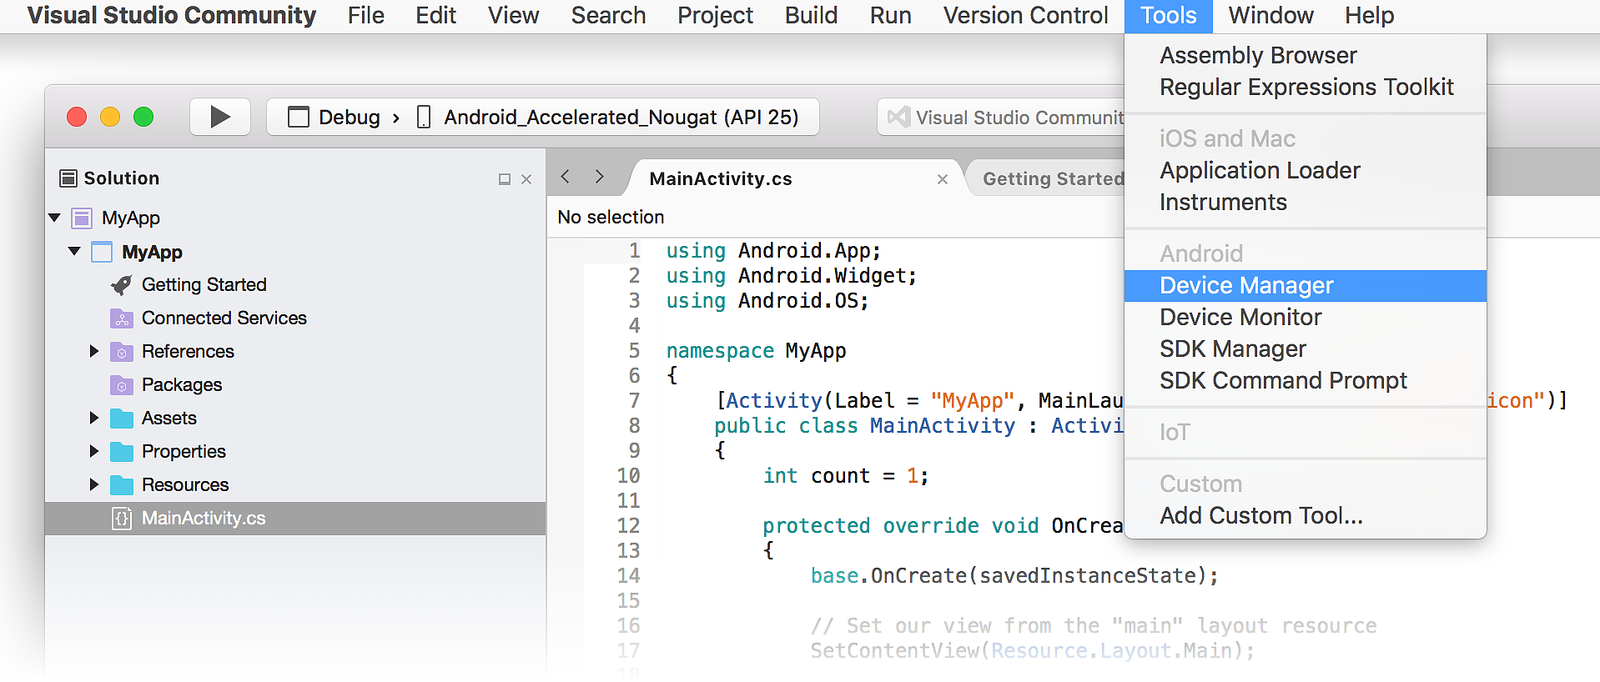
Launch the Android Device Manager by clicking Tools > Device Manager:
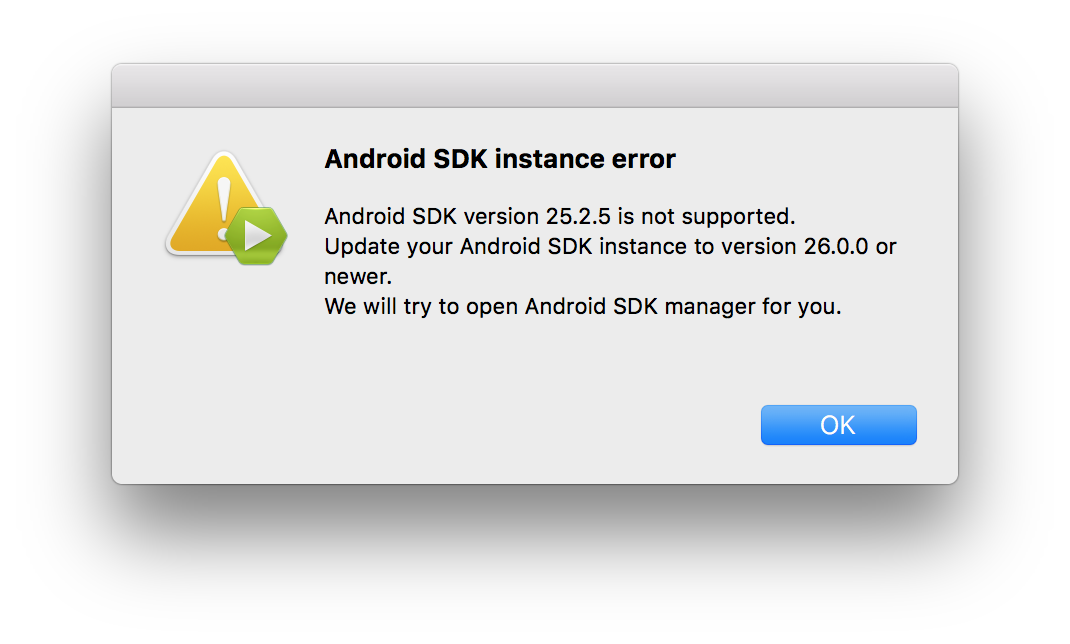
If the following error dialog is presented on launch, see the Troubleshooting section for workaround instructions:
Main Screen
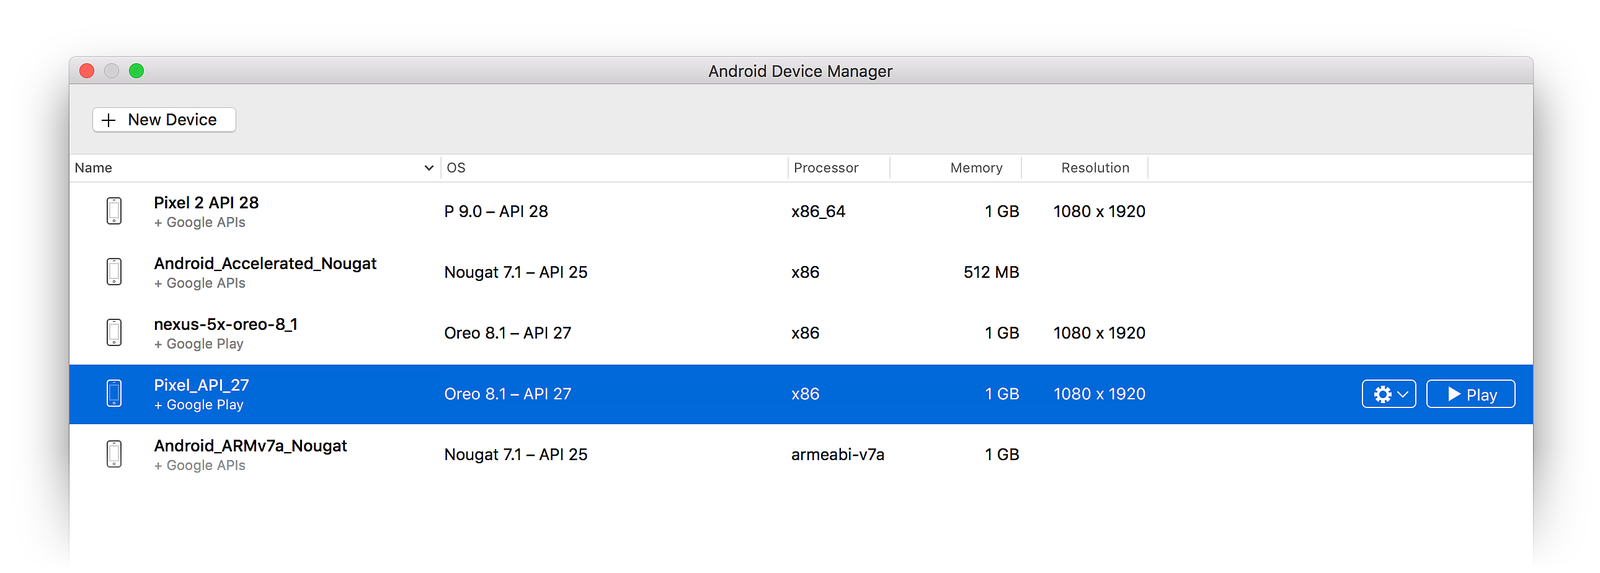
When you first launch the Android Device Manager, it presents a screen that displays all currently-configured virtual devices. For each virtual device, the Name, OS (Android Version), Processor, Memory size, and screen Resolution are displayed:
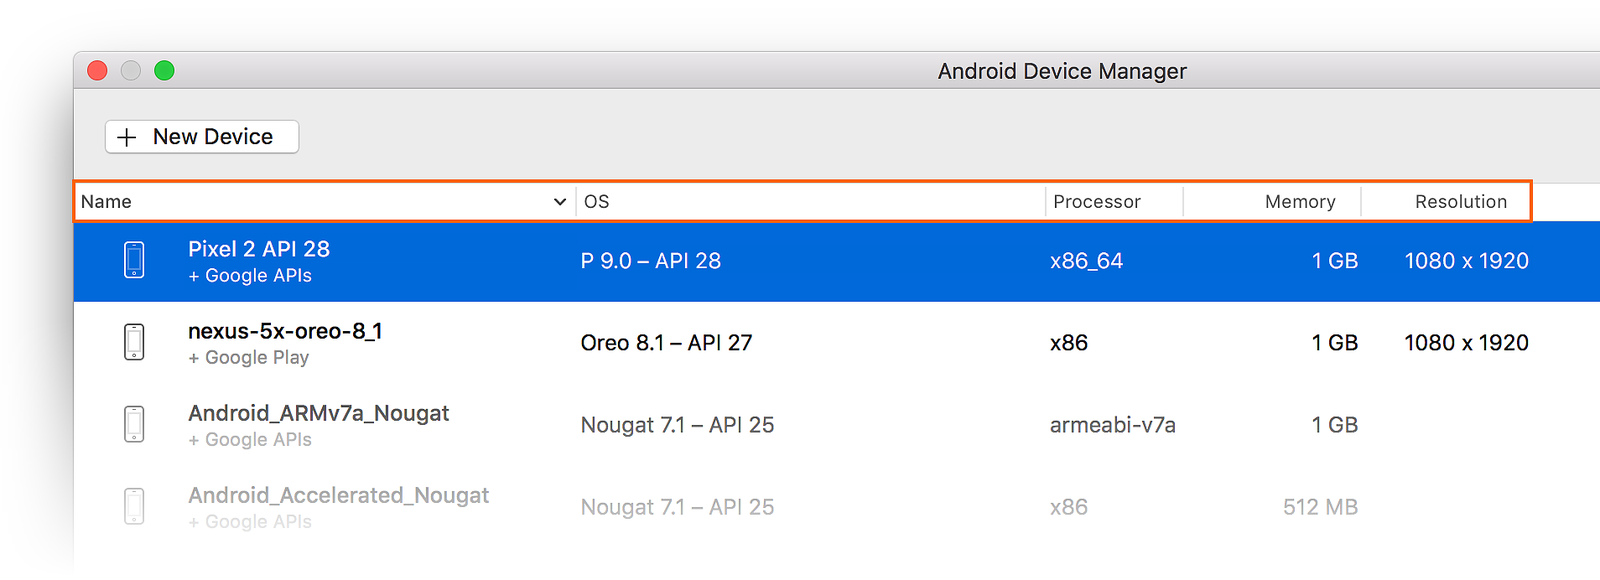
When you select a device in the list, the Play button appears on the right. You can click the Play button to launch the emulator with this virtual device:

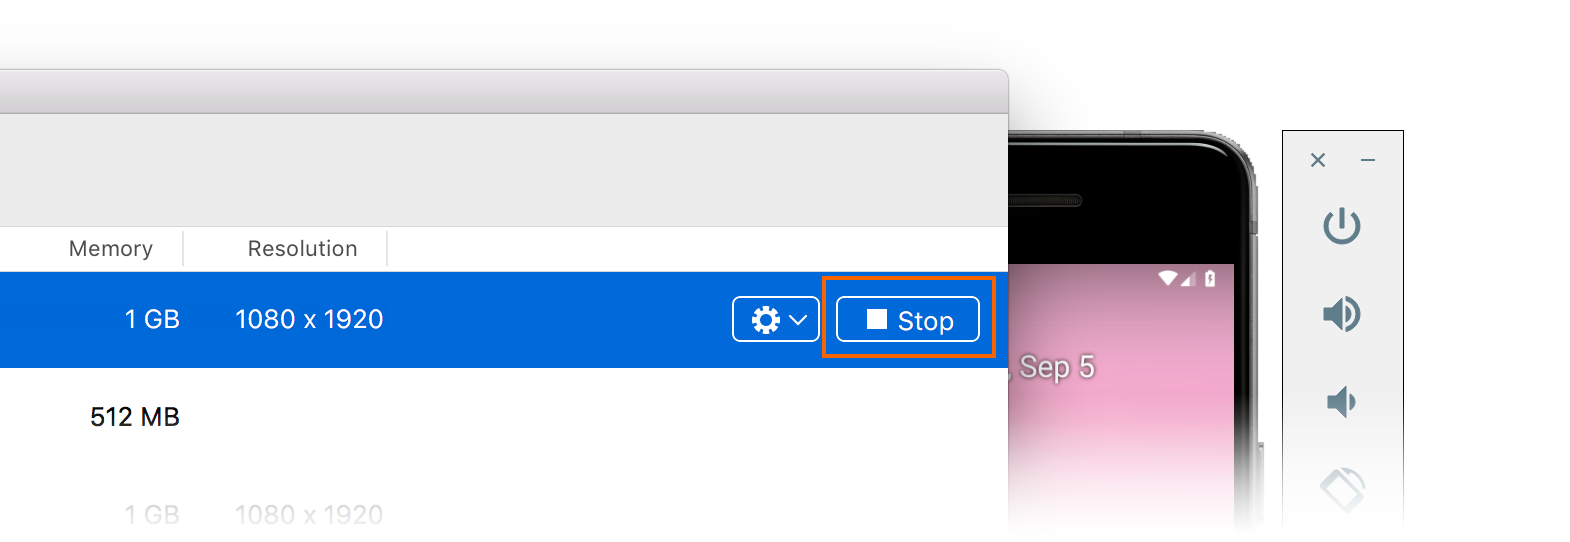
After the emulator starts with the selected virtual device, the Play button changes to a Stop button that you can use to halt the emulator:
When you stop the emulator, you may get a prompt asking if you want to save the current state for the next quick boot:
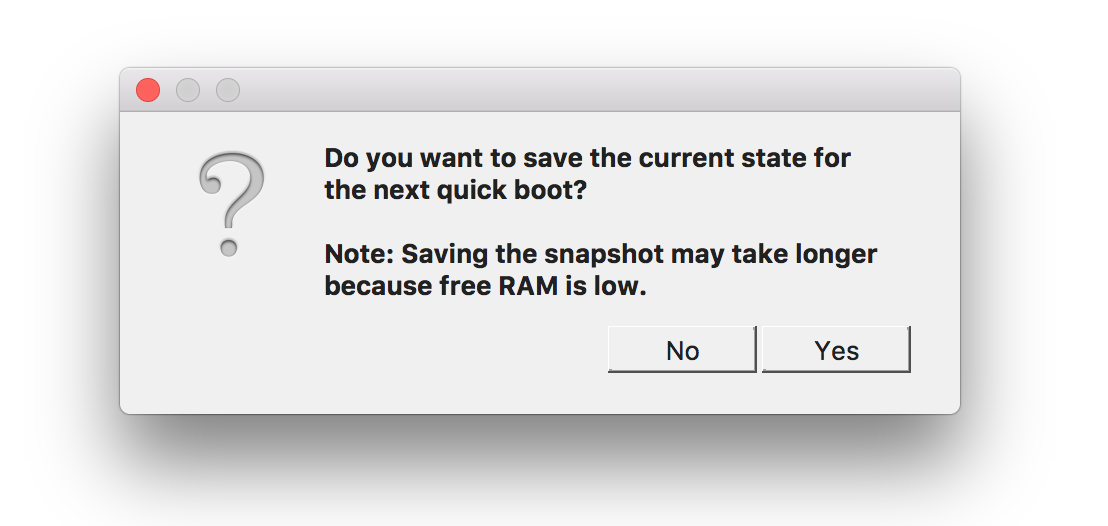
Saving the current state will make the emulator boot faster when this virtual device is launched again. For more information about Quick Boot, see Quick Boot.
New Device
To create a new device, click the New Device button (located in the upper left-hand area of the screen):
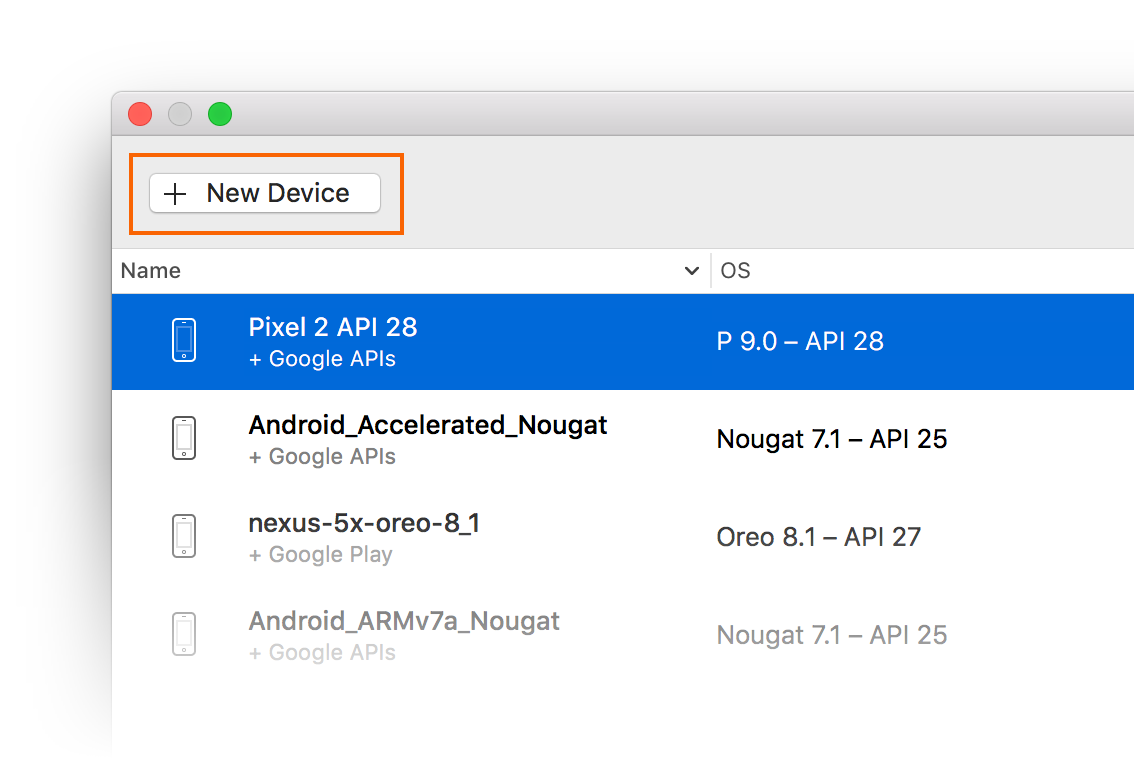
Clicking New Device launches the New Device screen:
Use the following steps to configure a new device in the New Device screen:
Give the device a new name. In the following example, the new device is named Pixel_API_27:
Select a physical device to emulate by clicking the Base Device pull-down menu:

Select a processor type for this virtual device by clicking the Processor pull-down menu. Selecting x86 will provide the best performance because it enables the emulator to take advantage of hardware acceleration. The x86_64 option will also make use of hardware acceleration, but it runs slightly slower than x86 (x86_64 is normally used for testing 64-bit apps):

Select the Android version (API level) by clicking the OS pull-down menu. For example, select Oreo 8.1 - API 27 to create a virtual device for API level 27:
If you select an Android API level that has not yet been installed, the Device Manager will display A new device will be downloaded message at the bottom of the screen – it will download and install the necessary files as it creates the new virtual device:

If you want to include Google Play Services APIs in your virtual device, enable the Google APIs option. To include the Google Play Store app, enable the Google Play Store option:
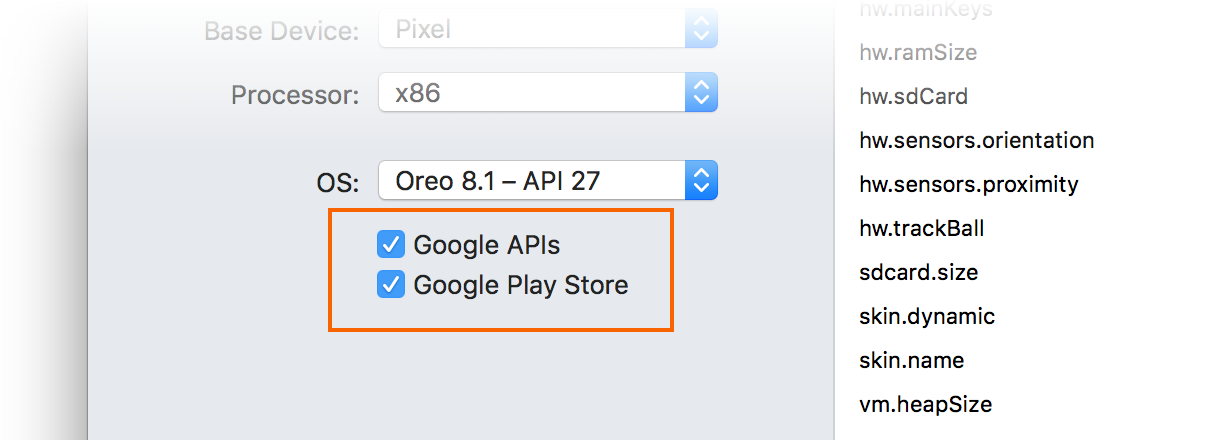
Note that Google Play Store images are available only for some base device types such as Pixel, Pixel 2, Nexus 5, and Nexus 5X.
Edit any properties that you need to modify. To make changes to properties, see Editing Android Virtual Device Properties.
Add any additional properties that you need to explicitly set. The New Device screen lists only the most commonly-modified properties, but you can click the Add Property pull-down menu (at the bottom) to add additional properties:
You can also define a custom property by clicking Custom... at the top of this property list.
Click the Create button (lower right-hand corner) to create the new device:
The Android Device Manager adds the new device to the list of installed virtual devices while displaying a Creating progress indicator during device creation:

When the creation process is complete, the new device is shown in the list of installed virtual devices with a Start button, ready to launch:
Edit Device
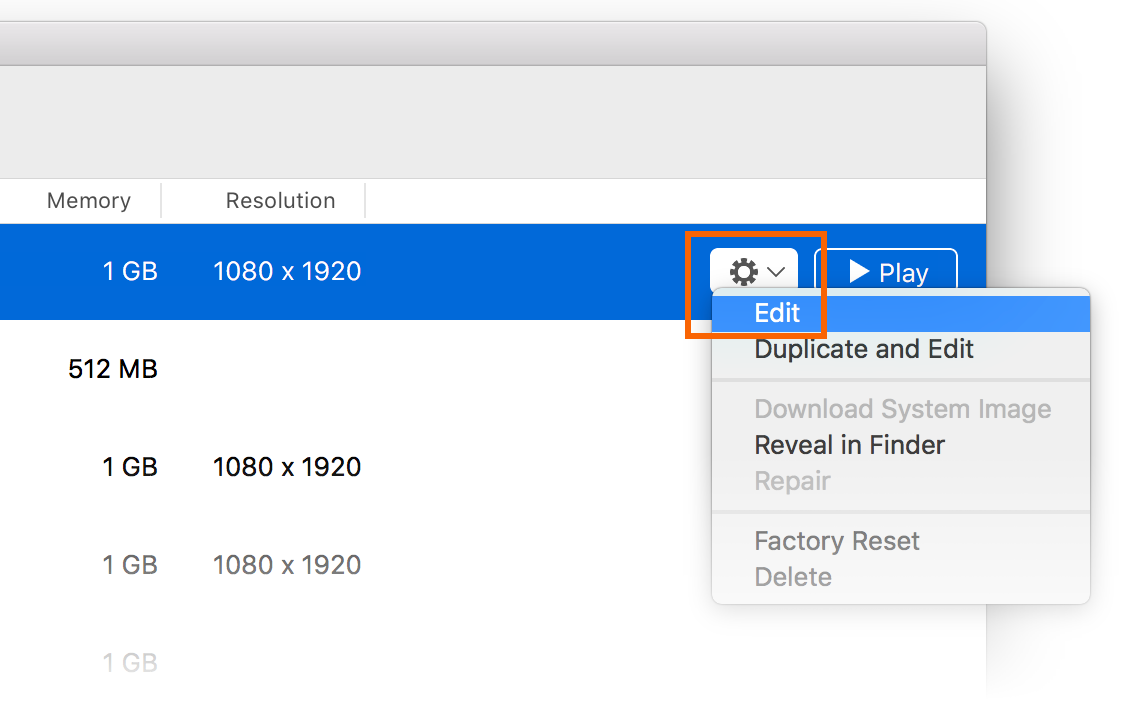
To edit an existing virtual device, select the Additional Options pull-down menu (gear icon) and select Edit:
Clicking Edit launches the Device Editor for the selected virtual device:
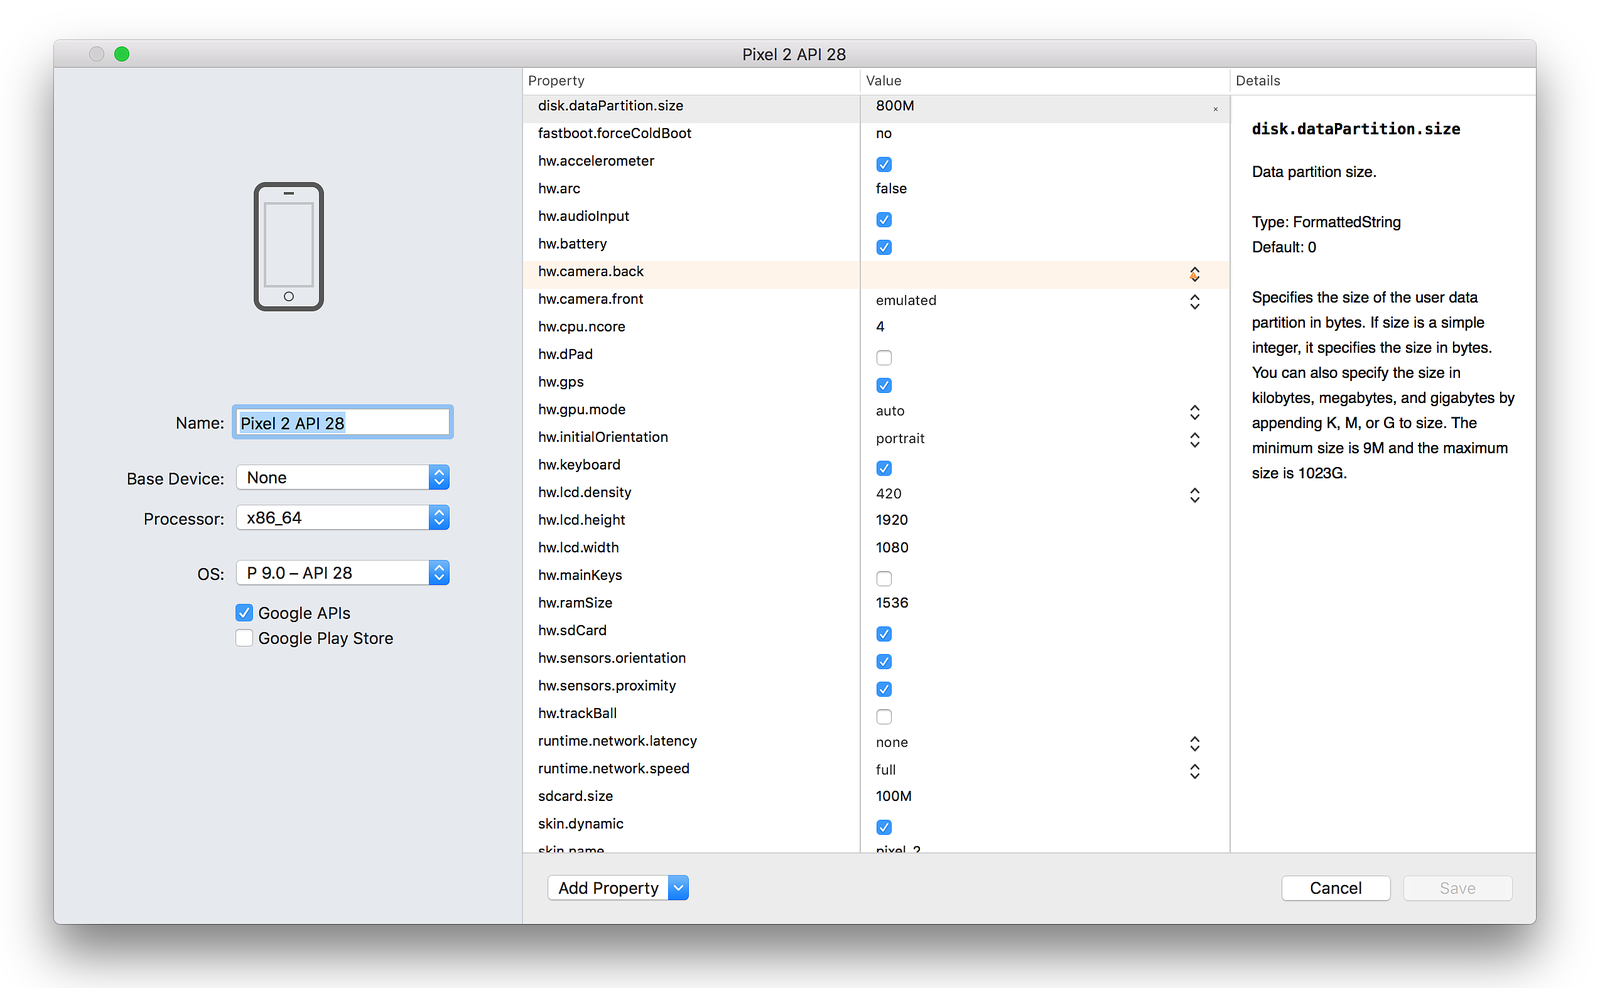
The Device Editor screen lists the properties of the virtual device under the Property column, with the corresponding values of each property in the Value column. When you select a property, a detailed description of that property is displayed on the right.
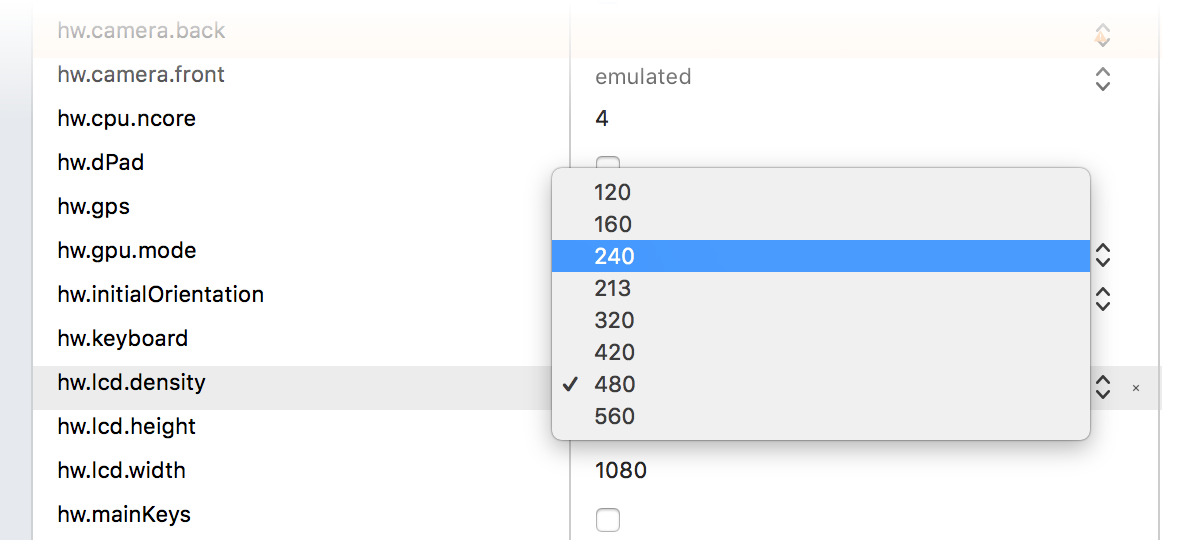
To change a property, edit its value in the Value column. For example, in the following screenshot the property is being changed from 480 to 240:
After you have made the necessary configuration changes, click the Save button. For more information about changing virtual device properties, see Editing Android Virtual Device Properties.
Additional Options
Additional options for working with a device are available from the pull-down menu located to the left of the Play button:
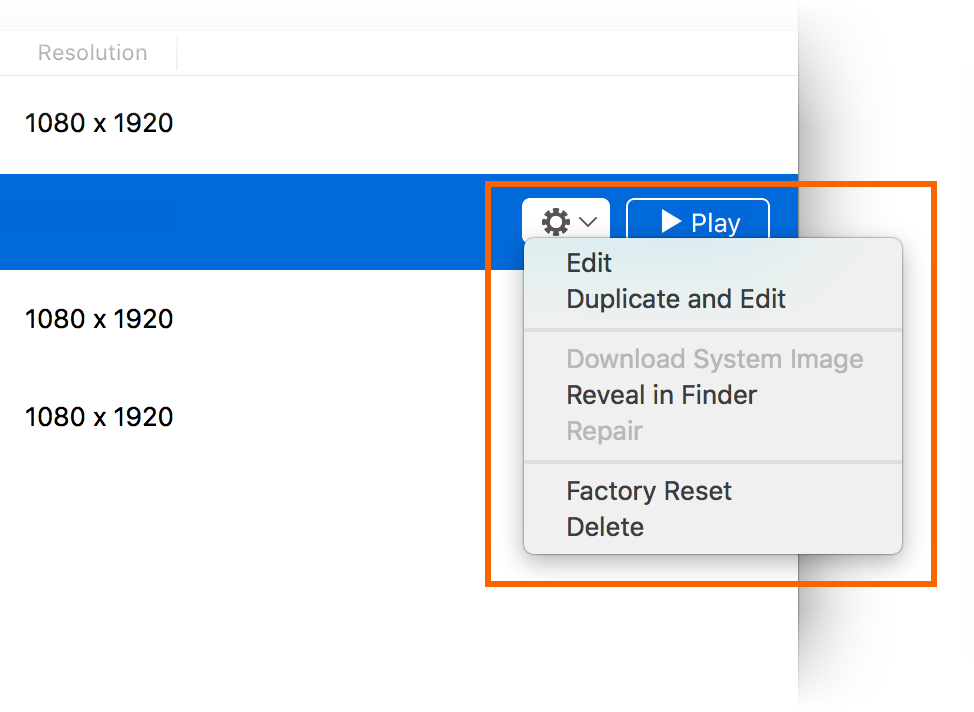
The additional options menu contains the following items:
Edit – Opens the currently-selected device in the device editor as described earlier.
Duplicate and Edit – Duplicates the currently-selected device and opens it in the New Device screen with a different unique name. For example, selecting Pixel 2 API 28 and clicking Duplicate and Edit appends a counter to the name:

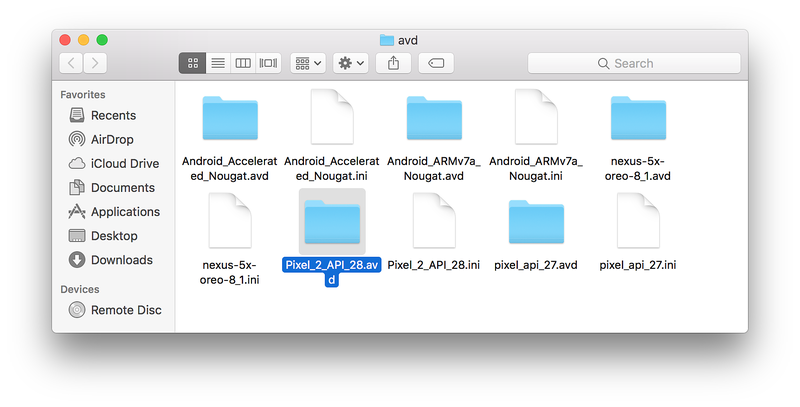
Reveal in Finder – Opens a macOS Finder window in the folder that holds the files for the virtual device. For example, selecting Pixel 2 API 28 and clicking Reveal in Finder opens a window like the following example:
Factory Reset – Resets the selected device to its default settings, erasing any user changes made to the internal state of the device while it was running (this also erases the current Quick Boot snapshot, if any). This change does not alter modifications that you make to the virtual device during creation and editing. A dialog box will appear with the reminder that this reset cannot be undone. Click Factory Reset to confirm the reset.
Delete – Permanently deletes the selected virtual device. A dialog box will appear with the reminder that deleting a device cannot be undone. Click Delete if you are certain that you want to delete the device.
Troubleshooting
The following sections explain how to diagnose and work around problems that may occur when using the Android Device Manager to configure virtual devices.
Android SDK in Non-Standard Location
Typically, the Android SDK is installed at the following location:
C:\Program Files (x86)\Android\android-sdk
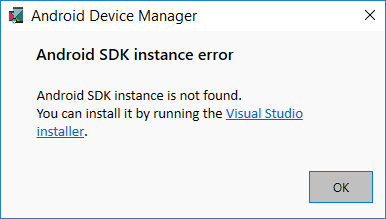
If the SDK is not installed at this location, you may get this error when you launch the Android Device Manager:
To work around this problem, use the following steps:
From the Windows desktop, navigate to C:\Users\username\AppData\Roaming\XamarinDeviceManager:

Double-click to open one of the log files and locate the Config file path. For example:

Navigate to this location and double-click user.config to open it.
In user.config, locate the element and add an AndroidSdkPath attribute to it. Set this attribute to the path where the Android SDK is installed on your computer and save the file. For example, would look like the following if the Android SDK was installed at C:\Programs\Android\SDK:
After making this change to user.config, you should be able to launch the Android Device Manager.
Wrong Version of Android SDK Tools
If Android SDK tools 26.1.1 or later is not installed, you may see this error dialog on launch:

If you see this error dialog, click Open SDK Manager to open the Android SDK Manager. In the Android SDK Manager, click the Tools tab and install the following packages:
- Android SDK Tools 26.1.1 or later
- Android SDK Platform-Tools 27.0.1 or later
- Android SDK Build-Tools 27.0.3 or later
Snapshot disables WiFi on Android Oreo
If you have an AVD configured for Android Oreo with simulated Wi-Fi access, restarting the AVD after a snapshot may cause Wi-Fi access to become disabled.
To work around this problem,
Select the AVD in the Android Device Manager.
From the additional options menu, click Reveal in Explorer.
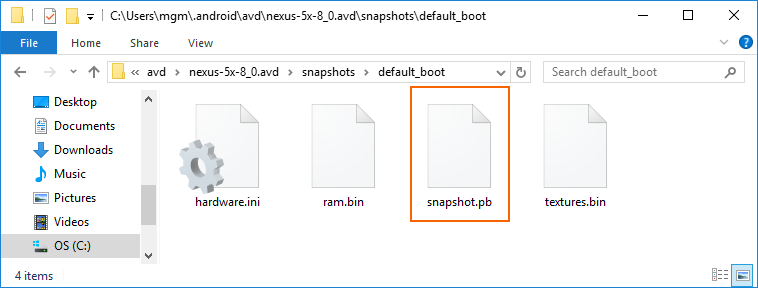
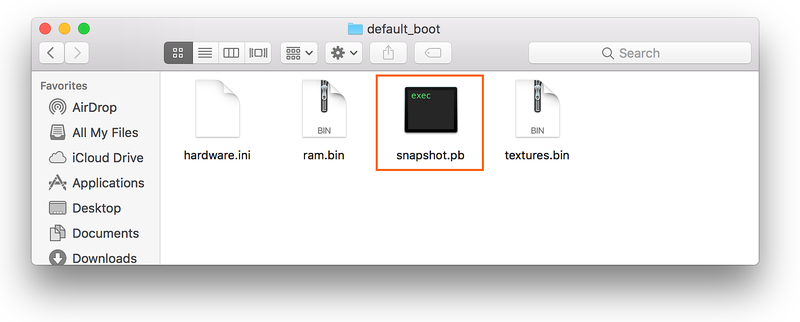
Navigate to snapshots > default_boot.
Delete the snapshot.pb file:
Restart the AVD.
After these changes are made, the AVD will restart in a state that allows Wi-Fi to work again.
Wrong Version of Android SDK Tools
If Android SDK tools 26.1.1 or later is not installed, you may see this error dialog on launch:

If you see this error dialog, click OK to open the Android SDK Manager. In the Android SDK Manager, click the Tools tab and install the following packages:
- Android SDK Tools 26.1.1 or later
- Android SDK Platform-Tools 28.0.1 or later
- Android SDK Build-Tools 26.0.3 or later
Snapshot disables WiFi on Android Oreo
If you have an AVD configured for Android Oreo with simulated Wi-Fi access, restarting the AVD after a snapshot may cause Wi-Fi access to become disabled.
To work around this problem,
Select the AVD in the Android Device Manager.
From the additional options menu, click Reveal in Finder.
Navigate to snapshots > default_boot.
Delete the snapshot.pb file:
Restart the AVD.
After these changes are made, the AVD will restart in a state that allows Wi-Fi to work again.
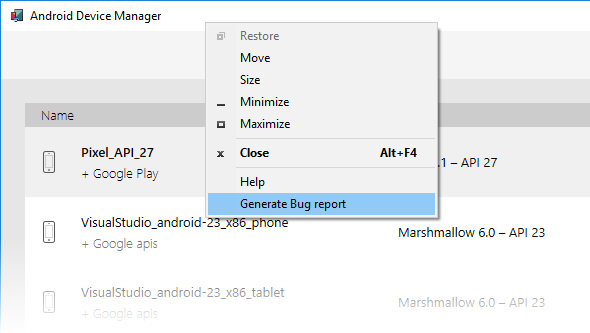
Generating a Bug Report
If you find a problem with the Android Device Manager that cannot be resolved using the above troubleshooting tips, please file a bug report by right-clicking the title bar and selecting Generate Bug Report:
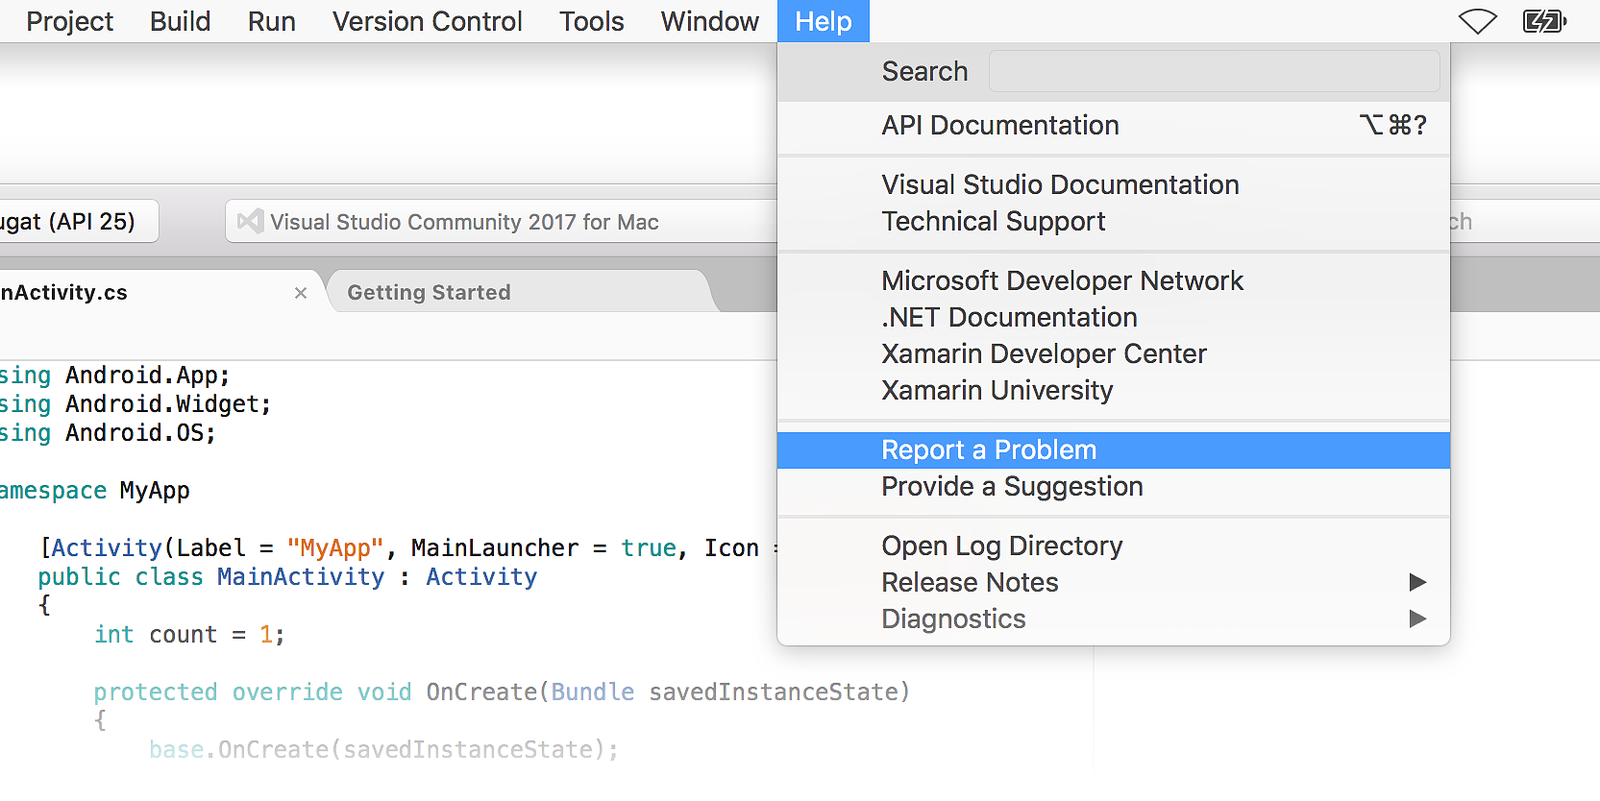
If you find a problem with the Android Device Manager that cannot be resolved using the above troubleshooting tips, please file a bug report by clicking Help > Report a Problem:
Summary
This guide introduced the Android Device Manager available in Visual Studio Tools for Xamarin and Visual Studio for Mac. It explained essential features such as starting and stopping the Android emulator, selecting an Android virtual device (AVD) to run, creating new virtual devices, and how to edit a virtual device. It explained how to edit profile hardware properties for further customization, and it provided troubleshooting tips for common problems.
Related Links
Related Video
Find more Xamarin videos on Channel 9 and YouTube.
Feedback
Android software development
Android software development is the process by which applications are created for devices running the Android operating system. Google states that[3] "Android apps can be written using Kotlin, Java, and C++ languages" using the Android software development kit (SDK), while using other languages is also possible. All non-JVM languages, such as Go, JavaScript, C, C++ or assembly, need the help of JVM language code, that may be supplied by tools, likely with restricted API support. Some programming languages and tools allow cross-platform app support (i.e. for both Android and iOS). Third party tools, development environments, and language support have also continued to evolve and expand since the initial SDK was released in 2008. The official Android app distribution mechanism to end users is Google Play; it also allows staged gradual app release, as well as distribution of pre-release app versions to testers.
Official development tools[edit]
Android SDK[edit]
The Android software development kit (SDK) includes a comprehensive set of development tools.[5] These include a debugger, libraries, a handset emulator based on QEMU, documentation, sample code, and tutorials. Currently supported development platforms include computers running Linux (any modern desktop Linux distribution), Mac OS X 10.5.8 or later, and Windows 7 or later. As of March 2015[update], the SDK is not available on Android itself, but software development is possible by using specialized Android applications.[6][7][8]
Until around the end of 2014, the officially-supported integrated development environment (IDE) was Eclipse using the Android Development Tools (ADT) Plugin, though IntelliJ IDEA IDE (all editions) fully supports Android development out of the box,[9] and NetBeans IDE also supports Android development via a plugin.[10] As of 2015, Android Studio,[11] made by Google and powered by IntelliJ, is the official IDE; however, developers are free to use others, but Google made it clear that ADT was officially deprecated since the end of 2015 to focus on Android Studio as the official Android IDE.[12] Additionally, developers may use any text editor to edit Java and XML files, then use command line tools (Java Development Kit and Apache Ant are required) to create, build and debug Android applications as well as control attached Android devices (e.g., triggering a reboot, installing software package(s) remotely).[13][6]
Enhancements to Android's SDK go hand-in-hand with the overall Android platform development. The SDK also supports older versions of the Android platform in case developers wish to target their applications at older devices. Development tools are downloadable components, so after one has downloaded the latest version and platform, older platforms and tools can also be downloaded for compatibility testing.[14]
Android applications are packaged in .apk format and stored under folder on the Android OS (the folder is accessible only to the root user for security reasons). APK package contains .dex files[15] (compiled byte code files called Dalvik executables), resource files, etc.
Android SDK Platform Tools[edit]
The Android SDK Platform Tools are a separately downloadable subset of the full SDK, consisting of command-line tools such as and .
Android Debug Bridge (ADB)[edit]
The Android Debug Bridge (ADB) is a tool to run commands on a connected Android device. The daemon runs on the device, and the client starts a background server to multiplex commands sent to devices. In addition to the command-line interface,[16] numerous graphical user interfaces exist to control adb.
The format for issuing commands is typically:
adb [-d|-e|-s <serialNumber>] <command> where -d is the option for specifying the single USB-attached device, -e for the single running Android emulator on the computer, -s for specifying a USB-attached device by its unique serial number. If there is only one attached device or running emulator, these options are not necessary.For example, Android applications can be saved by the command to a file, whose name is by default.[17]
In a security issue reported in March 2011, ADB was targeted as a vector to attempt to install a rootkit on connected phones using a "resource exhaustion attack".[18]
Fastboot[edit]
Fastboot is a protocol[19] and it has a tool with the same name included with the Android SDK package used primarily to modify the flashfilesystem via a USB connection from host computer. It requires that the device be started in a boot loader or Secondary Program Loader mode, in which only the most basic hardware initialization is performed. After enabling the protocol on the device itself, it will accept a specific set of commands sent to it via USB using a command line.[20] Some of the most commonly used fastboot commands include:
- flash – rewrites a partition with a binary image stored on the host computer.
- erase – erases a specific partition.
- reboot – reboots the device into either the main operating system, the system recovery partition or back into its boot loader.
- devices – displays a list of all devices (with the serial number) connected to the host computer.
- format – formats a specific partition; the file system of the partition must be recognized by the device.
Android NDK[edit]
Code written in C/C++ can be compiled to ARM, or x86native code (or their 64-bit variants) using the Android Native Development Kit (NDK). The NDK uses the Clang compiler to compile C/C++. GCC was included until NDK r17, but removed in r18 in 2018.
Native libraries can be called from Java code running under the Android Runtime using , part of the standard Android Java classes.[23][24]
Command-line tools can be compiled with the NDK and installed using adb.[25]
Android uses Bionic as its C library, and the LLVM libc++ as its C++ Standard Library. The NDK also includes a variety of other APIs:[26]zlib compression, OpenGL ES or Vulkan graphics, OpenSL ES audio, and various Android-specific APIs for things like logging, access to cameras, or accelerating neural networks.
The NDK includes support for CMake and its own (based on GNU Make). Android Studio supports running either of these from Gradle. Other third-party tools allow integrating the NDK into Eclipse[27] and Visual Studio.[28]
For CPU profiling, the NDK also includes simpleperf[29] which is similar to the Linux perf tool, but with better support for Android and specifically for mixed Java/C++ stacks.
Android Open Accessory Development Kit[edit]
The Android 3.1 platform (also backported to Android 2.3.4) introduces Android Open Accessory support, which allows external USB hardware (an Android USB accessory) to interact with an Android-powered device in a special "accessory" mode. When an Android-powered device is in accessory mode, the connected accessory acts as the USB host (powers the bus and enumerates devices) and the Android-powered device acts as the USB device. Android USB accessories are specifically designed to attach to Android-powered devices and adhere to a simple protocol (Android accessory protocol) that allows them to detect Android-powered devices that support accessory mode.[30]
External hardware development[edit]
Development tools intended to help an Android device interact with external electronics include IOIO, Android Open Accessory Development Kit, Microbridge, Triggertrap, etc.
Android Developer Challenge[edit]
The Android Developer Challenge was a competition to find the most innovative application for Android. Google offered prizes totaling 10 million US dollars, distributed between ADC I and ADC II. ADC I accepted submissions from January 2 to April 14, 2008. The 50 most promising entries, announced on May 12, 2008, each received a $25,000 award to further development.[31][32] It ended in early September with the announcement of ten teams that received $275,000 each, and ten teams that received $100,000 each.[33]
ADC II was announced on May 27, 2009.[34] The first round of the ADC II closed on October 6, 2009.[35] The first-round winners of ADC II comprising the top 200 applications were announced on November 5, 2009. Voting for the second round also opened on the same day and ended on November 25. Google announced the top winners of ADC II on November 30, with SweetDreams, What the Doodle!? and WaveSecure being nominated the overall winners of the challenge.[36][37]
Community-based distributions[edit]
There is a community of open-source enthusiasts that build and share Android-based distributions (i.e. firmware) with a number of customizations and additional features, such as FLAC lossless audio support and the ability to store downloaded applications on the microSD card.[38] This usually involves rooting the device. Rooting allows users root access to the operating system, enabling full control of the phone. Rooting has several disadvantages as well, including increased risk of hacking, high chances of bricking, losing warranty, increased virus attack risks, etc.[39] It is also possible to install custom firmware, although the device's boot loader must also be unlocked. Custom firmware allows users of older phones to use applications available only on newer releases.[40]
Those firmware packages are updated frequently, incorporate elements of Android functionality that haven't yet been officially released within a carrier-sanctioned firmware, and tend to have fewer limitations. CyanogenMod and OMFGB are examples of such firmware.
On September 24, 2009, Google issued a cease and desist letter[41] to the modder Cyanogen, citing issues with the re-distribution of Google's closed-source applications[42] within the custom firmware. Even though most of Android OS is open source, phones come packaged with closed-source Google applications for functionality such as the Google Play and GPS navigation. Google has asserted that these applications can only be provided through approved distribution channels by licensed distributors. Cyanogen complied with Google's license and continued to distribute its mod without the proprietary software. It provided a method to backup licensed Google applications during the mod's install process and restore them when the process is complete.[43]
Java standards[edit]
Obstacles to development include the fact that Android does not use established Java standards, that is, Java SE and ME. This prevents compatibility between Java applications written for those platforms and those written for the Android platform. Android reuses the Java language syntax and semantics, but it does not provide the full class libraries and APIs bundled with Java SE or ME.[44] However, there are multiple tools in the market from companies such as Myriad Group and UpOnTek that provide Java ME to Android conversion services.[45][46][47]
Android provides its own GUI classes, and does not provide Java AWT, Swing or JavaFX. It does not support the full Java Beans API.[citation needed]
History and market share[edit]
Android was created by the Open Handset Alliance, which is led by Google. The early feedback on developing applications for the Android platform was mixed.[48] Issues cited include bugs, lack of documentation, inadequate QA infrastructure, and no public issue-tracking system. (Google announced an issue tracker on January 18, 2008.)[49] In December 2007, MergeLab mobile startup founder Adam MacBeth stated, "Functionality is not there, is poorly documented or just doesn't work... It's clearly not ready for prime time."[50] Despite this, Android-targeted applications began to appear the week after the platform was announced. The first publicly available application was the Snake game.[51][52]
A preview release of the Android SDK was released on November 12, 2007. On July 15, 2008, the Android Developer Challenge Team accidentally sent an email to all entrants in the Android Developer Challenge announcing that a new release of the SDK was available in a "private" download area. The email was intended for winners of the first round of the Android Developer Challenge. The revelation that Google was supplying new SDK releases to some developers and not others (and keeping this arrangement private) led to widely reported frustration within the Android developer community at the time.[53]
On August 18, 2008, the Android 0.9 SDK beta was released. This release provided an updated and extended API, improved development tools and an updated design for the home screen. Detailed instructions for upgrading are available to those already working with an earlier release.[54] On September 23, 2008, the Android 1.0 SDK (Release 1) was released.[55] According to the release notes, it included "mainly bug fixes, although some smaller features were added." It also included several API changes from the 0.9 version. Multiple versions have been released since it was developed.[56]
On December 5, 2008, Google announced the first Android Dev Phone, a SIM-unlocked and hardware-unlocked device that is designed for advanced developers. It was a modified version of HTC's Dream phone. While developers can use regular consumer devices to test and use their applications, some developers may choose a dedicated unlocked or no-contract device.
As of July 2013[update], more than one million applications have been developed for Android,[57] with over 25 billion downloads.[58][59] A June 2011 research indicated that over 67% of mobile developers used the platform, at the time of publication.[60] Android smartphone shipments are forecast to exceed 1.2 billion units in 2018 with an 85% market share.[61]
See also[edit]
References[edit]
- ^"The Android Source Code". Source.Android.com. Retrieved February 2, 2017.
- ^Syed H (September 24, 2012). "Editorial: Why You Should Go Nexus". Droid Lessons. Archived from the original on February 18, 2017. Retrieved April 17, 2013.
- ^"Application Fundamentals". Android Developers.
- ^"SDK Tools | Android Developers". Developer.android.com. Retrieved April 25, 2018.
- ^"Tools Overview". Android Developers. July 21, 2009.
- ^ abappfour. "AIDE- IDE for Android Java C++ - Android Apps on Google Play". google.com.
- ^gesturedevelop. "Java Editor - Android Apps on Google Play". google.com.
- ^Tanapro GmbH, Tom Arn. "JavaIDEdroid - Android Apps on Google Play". google.com.
- ^"IntelliJ Android Development". Retrieved September 19, 2012.
- ^"NBAndroid Plugin". Retrieved September 19, 2012.
- ^"Android Studio".
- ^"Google Android Studio 3.4 Now Available". Retrieved April 25, 2019.
- ^Westfall, Jon (August 25, 2009). "Backup & Restore Android Apps Using ADB". JonWestfall.com. Retrieved December 7, 2009.
- ^"SDK Tools release notes". Android Developers.
- ^"Glossary". Android Developers.
- ^"Android Debug Bridge | Android Developers" Accessed December 27, 2012
- ^Jack Wallen (March 6, 2015). "How to create a full backup of your Android device without root". Retrieved January 29, 2016.
- ^Lemos, Robert "Open source vulnerabilities paint a target on Android"
- ^"Fastboot Protocol Documentation". android.googlesource.com. Retrieved July 7, 2019.
- ^Ravenscraft, Eric (June 13, 2014). "The Most Useful Things You Can Do with ADB and Fastboot on Android". Lifehacker. Retrieved July 7, 2019.
- ^ ab"Android NDK | Android Developers". Developer.android.com. November 13, 2012. Retrieved March 13, 2014.
- ^"NDK Downloads | Android Developers". developer.android.com. Retrieved April 24, 2018.
- ^Srinivas, Davanum (December 9, 2007). "Android — Invoke JNI based methods (Bridging C/C++ and Java)". Archived from the original on December 16, 2008. Retrieved December 13, 2008.
- ^"java.lang.System". Android Developers. Retrieved September 3, 2009.
- ^"Android Debug Bridge (adb)".
- ^"Android NDK Native APIs | Android NDK".
- ^"Using Eclipse for Android C/C++ Development". January 23, 2011.
- ^"Using Visual Studio to Develop Native Android Code – VisualGDB Tutorials".
- ^"Simpleperf | Android NDK".
- ^"Accessory Development Kit | Android Developers guides". Developer.android.com. Retrieved October 2, 2012.
- ^Chen, Jason (May 12, 2008). "The Top 50 Applications". Android Developers Blog. Archived from the original on September 25, 2009. Retrieved September 4, 2009.
- ^Brown, Eric (May 13, 2008). "Android Developer Challenge announces first-round winners". Linux for Devices. Archived from the original on May 14, 2008.
- ^"ADC I Top 50 Gallery". Android Developer Challenge. Retrieved May 19, 2009.
- ^"Android Developer Challenge". Google Code. Retrieved January 11, 2008.
- ^Chu, Eric (October 6, 2009). "ADC 2 Round 1 Scoring Complete". Android Developers Blog. Archived from the original on November 1, 2009. Retrieved November 3, 2009.
- ^"ADC 2 Overall Winners". Android Developer Challenge. Archived from the original on January 4, 2011. Retrieved December 5, 2010.
- ^Kharif, Olga (November 30, 2009). "Android Developer Challenge 2 Winners Announced". BusinessWeek. Retrieved December 5, 2010.
- ^"Dream android development". xda-developers forum. Retrieved September 11, 2009.
- ^"Rooting: Advantages and Disadvantages". ITCSE forum. Archived from the original on November 29, 2014. Retrieved September 21, 2013.
- ^"Android 2.1 from Motorola Droid Ported to G1". Volt Mobile. March 10, 2010. Archived from the original on May 31, 2011. Retrieved May 13, 2011.
- ^Wimberly, Taylor (September 24, 2009). "CyanogenMod in trouble?". Android and me. Archived from the original on October 3, 2009. Retrieved September 26, 2009.
- ^Morrill, Dan (September 25, 2009). "A Note on Google Apps for Android". Android Developers Blog. Archived from the original on October 25, 2009. Retrieved September 26, 2009.
- ^"The current state..."CyanogenMod Android ROM. September 27, 2009. Archived from the original on November 3, 2009. Retrieved September 27, 2009.
- ^van Gurp, Jilles (November 13, 2007). "Google Android: Initial Impressions and Criticism". Javalobby. Retrieved March 7, 2009.
- ^"Myriad's New J2Android Converter Fuels Android Applications Gold Rush". March 19, 2010. Archived from the original on July 4, 2011. Retrieved May 13, 2011.
- ^Fruhlinger, Josh (March 23, 2010). "J2Android hopes you don't know that Android is Java-based". JavaWorld. Retrieved 2020-07-13.
- ^Fruhlinger, Josh (March 31, 2010). "Myriad CTO: J2Android moves MIDlets to "beautiful" Android framework". JavaWorld. Retrieved 2020-07-13.
- ^Paul, Ryan (December 19, 2007). "Developing apps for Google Android: it's a mixed bag". Ars Technica. Archived from the original on December 20, 2007. Retrieved December 19, 2007.
- ^Morrill, Dan (January 18, 2008). "You can't rush perfection, but now you can file bugs against it". Android Developers Blog. Retrieved September 3, 2009.
- ^Morrison, Scott (December 19, 2007). "Glitches Bug Google's Android Software". The Wall Street Journal. Retrieved December 19, 2007.
- ^"Snake". Android Freeware Directory. Retrieved January 26, 2008.
- ^"First Android Application — Snake". Mobiles2day. November 14, 2007. Archived from the original on May 11, 2008. Retrieved January 7, 2008.
- ^Metz, Cade (July 14, 2008). "Google plays Hide and Seek with Android SDK". The Register. Archived from the original on October 6, 2008. Retrieved October 23, 2008.
- ^"Android — An Open Handset Alliance Project: Upgrading the SDK". Archived from the original on September 13, 2008. Retrieved October 24, 2008.
- ^"Other SDK Releases". Android Developers. Retrieved September 2, 2009.
- ^"SDK Archives". Android Developers.
- ^"Google Play Hits 1 Million Apps". Mashable. July 24, 2013.
- ^"Android App Stats". Archived from the original on January 2, 2011. Retrieved December 31, 2010.
- ^Leena Rao (April 14, 2011). "Google: 3 Billion Android Apps Installed; Downloads Up 50 Percent From Last Quarter". Techcrunch. Archived from the original on April 25, 2011. Retrieved May 13, 2011.
- ^"Developer Economics 2011". Archived from the original on September 29, 2013. Retrieved July 8, 2011.
What’s New in the Genymotion Serial Number Archives?
Screen Shot

System Requirements for Genymotion Serial Number Archives
- First, download the Genymotion Serial Number Archives
-
You can download its setup from given links:

Genymotion Serial Number Archives & Serial Key Download

Genymotion Serial Number Archives& PC Free Download
