
Controls For Minecraft Shift clicking Archives

Controls For Minecraft Shift clicking Archives
Learning to program with Minecraft
Minecraft [1], the "social lego" with zombies, skeletons, and creepers, has become a social phenomenon, earning a place in the Smithsonian's "Art of Videogames," a feature-length documentary [2], an article in The Guardian, and ports to nearly every modern personal computing platform in existence, including the Raspberry Pi.
Although you can run a Minecraft server from your Pi, hardware constraints won't allow you to play the full version directly on your Pi. However, a client version has been adapted to the Raspberry Pi, and that is the one I'll be using in this article.
Down the Shaft
The Pi version of Minecraft [3] is a bit limited, in that you can only use the Creative playing mode. This is similar to early versions of the game for mobile devices. In this mode, you have no mobs (animals, monsters, and non-player humans – a.k.a. "villagers"), and although you can dig, you can't pick up blocks (mine) or transform combinations of blocks into new objects (craft). Instead, in your inventory, you have an infinite number of the blocks and tools you need, and you use those to do your building.
To start, Creative mode might make the Pi version less fun, but it is offset by the fact that the creators have included a nice and simple API that allows you to program new features into the game using the Python programming language.
Mining In
To install Minecraft, download the package [4] into a directory of your choice and unzip it from a terminal with:
$ tar zxvf minecraft-pi-0.1.1.tar.gzNow you can visit the directory () and start playing the game by typing:
$ ./minecraft-piWhen you run Minecraft, you can choose either Start Game or Join Game, if a game is running on a server (Figure 1). For simplicity's sake, I'll be running a single-player game on a local server (i.e., I'll choose Start Game).
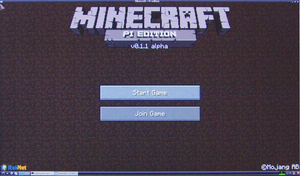 Figure 1: The first run of Minecraft: Pi Edition.
 Although I will not delve into everything you can do in Minecraft, it'll help if you have a basic knowledge of how to make your way around the world. Table 1 lists some of the ways to navigate, take action, or even build something!
Keyboard | |
|---|---|
Key | Action |
w | Move in the direction the character is facing |
a | Sidestep left |
s | Move backward |
d | Sidestep right |
Space bar | Jump; double tap to start/stop flying, hold to fly higher |
Shift | Crouch; hold to fly lower |
e | Open inventory (use w, a, s, and d keys to navigate) |
1-8 | Select inventory slot item to use |
Esc | Show/hide menu |
Tab | Release mouse without showing menu |
Enter | Confirm menu selection |
Mouse | |
Gesture | Action |
Move | Look/turn around |
Left-click (hold) | Hit block to remove it |
Right-click | Place block; hit block with sword |
Mouse wheel | Select inventory slot item to use |
« Previous123Next »
(Java Parity) Add all Java's UI shortcuts to Bedrock
We welcome feedback about menus, toggles on menus, buttons on menus, input devices (like touch controls and keyboards), and Minecraft’s interface. How do you play? What would make it better?
Inventory/containers:
- Hovering over an item and tapping 0-9 moves the item to that hotbar slot
- Middle clicking an item in creative clones the item
- Shift + double click to move all of the same item type across containers
- "X" slot in creative inventory to delete items, shift + clicking it clears inventory
- In creative inventory, typing should automatically start typing in the search box (especially when I just clicked the search icon or pressed T to bring up the search bar)
- F to swap item between mainhand/offhand
- X + 0-9 to load hotbar
- C + 0-9 to save hotbar
Text:
- Ctrl + arrow keys to move cursor over whole words at once (MCPE-28492)
- Ctrl + backspace to delete whole words at once
- Ctrl + X to cut text
- Show what text is selected (e.g: highlight in blue)
Function buttons:
- F2 to take a screenshot (and display clickable link)
- F3 to open debug info
- F3 + A to reload chunks
- F3 + T to reload edited packs
- F3 + P to toggle auto-pause
- F3 + H to toggle default item descriptions (IDs, damage values)
- F3 + C to copy coordinates to chat
- F3 + B to show hitboxes
- F3 + D to clear chat
- F3 + N to toggle between creative and spectator (when spectator is added)
- F3 + G to show chunk boundaries
- F11 to toggle fullscreen
Main menus:
- Shift + arrow keys to reorganize servers
I've listed the mouse/keyboard combos that Java uses, but many of these shortcuts could also be implemented for touch/controllers. E.G: Long-press an item in creative to clone it, or double-tap on the X slot to clear inventory,
39 Comments
Post a new comment:
Please sign in to leave a comment.

By StellaArtois, mabrowning, darktemp, Zach Jaggi, Jademalo and others
MINECRIFT 1.7.10 R3 with Forge #1614, Oculus SDK 1.3 support (Windows only)
Installer download link:
Minecrift 1.7.10 R3
- Supports Oculus SDK 1.3. NOTE:Oculus Home must be installed, running and Oculus Home->Settings->General->Unknown Sources MUST be enabled to allow Minecrift to use the Rift.
- Supports Forge 1.7.10 #1614
Forge support requires prior installation of Forge 1.7.10 #1614. Install with the 'Install with Forge' checkbox ticked, then run Minecrift using the Minecrift Forge launcher profile.
See the release notes link on the installer for a more detailed overview of changes.
Support for Minecraft 1.8.9 is currently in progress, a link will be posted here once complete.
MINECRIFT 1.7.10 R2 with Forge #1614, Oculus SDK 0.8 support (Windows only)
Installer download link:
Minecrift 1.7.10 R2
- Supports Oculus SDK 0.8.
- Supports Forge 1.7.10 #1614
MINECRIFT 1.7.10 R1 with Forge #1448, Oculus SDK 0.5 support (Windows, OSX, Linux):
Installer download links:
Windows EXE
OSX / Linux JAR
Installation Instructions for Minecrift 1.7.10:
- - Install the appropriate Oculus runtime dependent upon supported Oculus SDK.
- Ensure you have run VANILLA Minecraft 1.7.10 at least once before running the Minecrift installer:- - Load the Minecraft launcher via Minecraft.exe.
- In the bottom left select 'Edit Profile'.
- Select Use version: release 1.7.10.
- Save profile, and hit play to run the game. Quit out.
- Download the Minecrift installer exe from the link above.
- On Windows, run the installer. On linux or osx, run the installer.jar via the commandline with java -jar <installername>.jar.
- If you wish to install with Forge, ensure the 'Install with Forge' checkbox is ticked.
- Click OK to install. - - Load the Minecraft launcher via Minecraft.exe.
- - Run up the Minecraft launcher.
- Select your desired Minecrift profile.
- Click 'Play'!
 With thanks to the team behind JProfiler for providing us with a free open-source licence for their profiling tools. See HERE
===================
Older Downloads
Minecrift 1.8.1 PRE2 (PREVIEW RELEASE, WINDOWS ONLY):
Download:
minecrift-1.8.1-PRE2-installer.txt
Replace .txt with .exe after download.Mirror here
Minecrift is open source. If you'd like to contribute, go to 1.7.10 HEREand 1.8.1 HERE. See the README.md to get started.
Features
- - Supports Minecraft 1.8.1, 1.7.10
- Oculus Rift DK1, DK2 support via Oculus SDK 0.4.4 (requires the 0.4.4 Oculus Runtime from HERE).
- Built on top of Optifine 1.8.1 HD U B2, 1.7.10 HD U A4 - please donate and click on a few ads HERE, it's a great mod!
- DK2 positional head tracking fully supported!
- - Windows only currently
- The Forge version is NOT currently working.
- Direct mode should be working on 'non-complicated' setups.
NOTE: The mirrored window cannot currently be full-screened.
NOTE: Be sure to use Oculus runtime 0.4.4
NOTE: For Windows users - ensure AERO is enabled if possible (choose an Aero enabled desktop theme).
NOTE: Ensure Vsync and triple buffering are set to 'application controlled' in your graphics drivers.
NOTE: If you still have FPS issues, try toggling Mirroring OFF then ON (Options->Vr Settings->Stereo Rendering)
- If using extended mode, set the Rift as the primary monitor (and ideally your other monitor set to 75Hz). When running, set Minecrift to fullscreen with F11.
- If you get judder, reduce the graphics setting in Minecraft (start with render distance)
- Can crash if render settings are changed in-game. Change the render settings in the out-of-world initial menu if you have problems.
- Some fog draw distance render issues.
- Hydra support is currently broken.
- If you get hitching / lag issues during mouse movement:- - Windows 8.1 mouse lag issue - go to the properties of the minecraft.exe file and go to the compatibility settings:
- set to windows 8 compatability mode
run as administrator
check the "disable DPI scaling" option
- set to windows 8 compatability mode
- - Windows 8.1 mouse lag issue - go to the properties of the minecraft.exe file and go to the compatibility settings:
NOTE - This will NOT work correctly with a DK1 or DK2 with the Oculus Runtime installed. It will work correctly with a DK1 ONLY with the Oculus runtime disabled.
Download here (and remove .txt extension):
Windows:
minecrift-1.6.4-b28-installer.exe.txt
Linux / MacOS:minecrift-1.6.4-b28-installer.jar.txt
Features- - Supports Minecraft 1.6.4. 1.7 support will require a major rewrite, so don't expect it anytime soon!
- Easy to use installer (1.6 and up)
- Oculus Rift DK1, HD support via SDK 0.2.5c.
- Built on top of Optifine 1.6.4 HD U D1 - please donate and click on a few ads HERE, it's a great mod!
- Minecraft Forge compatible - SEE BELOW
- Razor Hydra support
- Positional head tracking with Razer Hydra. See the guidelines HERE.
- Mouse free-look with keyhole adjustment.
- Razer Hydra free-aim controls.
- Razer Hydra joystick/button controls.
- Oculus Rift Player Profile support.
- VR GUI menu with extensive configuration options.
- - Ensure you have run VANILLA Minecraft 1.6.4 (1.6.2 for the 1.6.2 Minecrift build) at least once before:
- - Load the Minecraft launcher via Minecraft.exe.
- In the bottom left select 'Edit Profile'.
- Select Use version: release 1.6.4 (or release 1.6.2).
- Save profile, and hit play to run the game. Quit out.
- On Windows, run the installer. A smart screen filter may appear. Click 'More Info', then 'Run Anyway'. Accept the UAC prompt.
- On Linux / MacOS, double click the .jar file to run the installer. (Or, from a commandline run >java -jar <path to file>/minecrift-1.6.X-bXXX-installer.jar e.g. >java -jar ./minecrift-1.6.4-b8-installer.jar)
- Click OK to install a new Minecrift profile.
- On Windows, you may get a dialog that implies Minecrift failed to install correctly. Select 'The program installed correctly'.
- On Windows, IMPORTANT: You'll need to download and install the MSVC++ 2010 redistributables if they aren't already installed (vcredist_x64.exe or vcredist_x86.exe if you are using 64bit or 32bit Java for Minecraft, respectively. Download and install both if you are unsure as to which you need.). - - Load the Minecraft launcher via Minecraft.exe.
- - Run up the Minecraft 1.6 launcher.
- Navigate to the 'Local Version Editor (NYI)' tab.
- Click on the minecrift-1.6.x-bxxx entry depending on the downloaded version (e.g. minecrift-1.6.4-b8)
- Press Play!
- - INSTALL FORGE BEFORE MINECRIFT. Otherwise start with a clean Minecraft install.
- Run vanilla Minecraft (of the version the same as the Minecrift version, e.g. 1.6.4) at least once. See above.
- Download the latest Forge version (e.g. for 1.6.2 - 9.10.1.871 from HERE). Select (Installer).
- To run the installer:- - On Mac or Linux, double click the jar to run it.
- On Windows, open an administrative command prompt, change directory to the location of the forge installer jar, and enter e.g.:Code: Select all

- When done, install Minecrift as above. Check 'Install with forge' with the appropriate forge version selected. OK. (If Forge is not installed there will be no entries available in the dropdown).
IMPORTANT:
- Now load up the Minecraft launcher. Select 'Edit Profile'.
- Enable the JVM Arguments edit box, and add the following after any existing text:[/b]Code: Select all

- It is also recommended to select 'Launcher Visibility: Keep the launcher open' to allow debugging of launch issues.
- Click Save Profile. You should now be ready to play Minecrift with Forge enabled. - - On Mac or Linux, double click the jar to run it.
Please submit any bug reports with as much information and / or screenshots attached HERE
For older Minecraft builds (these may not be as up to date as the main build above):
Download
LATEST BUILD FOR 1.6.2 HERE
LATEST BUILD FOR 1.5.2 HERE
For instructions on setting up FTB for 1.5.2 see HERE
LATEST BUILD FOR 1.4.7 HERE
Installation Instructions for 1.5.2 or 1.4.7
The recommended way to install Minecrift for 1.5.2 or 1.4.7 is use the magic launcher, which is available for Windows, OSX, and Linux.
IMPORTANT:You'll need to downloadand install the MSVC++ 2010 redistributables if they aren't already installed (vcredist_x64.exe or vcredist_x86.exe if you are 64bit or 32bit respectively). (Windows Only)
- Download Optifine HD D3 (D5 has not been tested, but may work), but don't extract. Please click a few ad links or donate and get yourself an Optifine cloak, they do some great work.
Download the JRift.jar, Sixense.jar from the 1.5.2 link above.
Download the minecrift_classes.zip from either the 1.4.7 or 1.5.2 link, depending on the version of Minecraft you want to patch.
Open the Magic Launcher.
Click the 'Setup' configuration button.
Create a new Configuration and call it "minecrift" (or whatever you prefer)
Add these zips, in order:- * OptiFine_1.5.2_HD_U_D3.zip
* JRift.jar
* SixenseJava.jar (if you have a Razer Hydra you'd like to use)
* minecrift_1.0_beta_classes.zip
When satisfied, click 'OK' to Save the configuration.
From now on, just start Magic Launcher and use the "minecrift" configuration to play! - * OptiFine_1.5.2_HD_U_D3.zip
In addition, you will need to update LWJGL to the latest version. Older versions will probably not work.
Razer Hydra
Version 1.0 is the first to include full Razer Hydra support.
* OrientationTracker: If you don't have an Oculus Rift, you can use the left controler for head orientation (direction).
* PositionTracker: This makes a huge immersion difference. The Hydra can feed position data the game engine to allow you to look up, down, around corners, squat, and generally move around. Use one or two controllers attached to your head and adjust the offsets from your eye center on the VR Options.
* Controller: Use the right controller to turn the view left/right, move forward and backwards, place blocks, mine, select item, jump, sneak, access your inventory and navigate menus. The controls are currently hardcoded: (right controller)
Code: Select all
Code: Select all
Joystick sensitivity can be set in VR Options.
{Thanks to Dakor for the Minecrift logo!}
You do not have the required permissions to view the files attached to this post.
Last edited by StellaArtois on Mon May 16, 2016 11:18 am, edited 160 times in total.
Источник: [https://torrent-igruha.org/3551-portal.html]What’s New in the Controls For Minecraft Shift clicking Archives?
Screen Shot

System Requirements for Controls For Minecraft Shift clicking Archives
- First, download the Controls For Minecraft Shift clicking Archives
-
You can download its setup from given links:

Controls For Minecraft Shift clicking Archives & Software

Controls For Minecraft Shift clicking Archives& Key Download
