
Google Play For Windows Archives

Google Play For Windows Archives
Transfer files between your computer and Android device
You can use your Google Account or a USB cable to move photos, music and other files between your computer and phone.
Option 1: Move files with your Google Account
Upload files to your Google Account to use them on both your computer and phone.
Option 2: Move files with a USB cable
- Unlock your phone.
- With a USB cable, connect your phone to your computer.
- On your phone, tap the 'Charging this device via USB' notification.
- Under 'Use USB for', select File Transfer.
- A file transfer window will open on your computer. Use it to drag files.
- When you've finished, eject your phone from Windows.
- Unplug the USB cable.
Your computer must be using Mac OS X 10.5 and up.
- Download and install Android File Transfer on your computer.
- Open Android File Transfer. The next time that you connect your phone, it opens automatically.
- Unlock your phone.
- With a USB cable, connect your phone to your computer.
- On your phone, tap the 'Charging this device via USB' notification.
- Under 'Use USB for', select File Transfer.
- An Android File Transfer window will open on your computer. Use it to drag files.
- When you’ve finished, unplug the USB cable.
- Unlock your phone.
- With a USB cable, connect your phone to your Chromebook.
- Unlock your phone.
- On your phone, tap the 'Charging this device via USB' notification.
- Under 'Use USB for', select File Transfer.
- On your Chromebook, the Files app opens. Use it to drag files. Learn what file types work on Chromebooks.
- When you've finished, unplug the USB cable.
Troubleshoot moving files by USB
- Troubleshoot your computer
- Check your computer’s settings to make sure that Windows automatically detects new hardware.
- Restart your computer.
- Troubleshoot your phone
- Troubleshoot your USB connections
- Try a different USB cable. Not all USB cables can transfer files.
- To test the USB port on your phone, connect your device to a different computer.
- To test the USB port on your computer, connect a different device to your computer.
- Troubleshoot your computer
- Check that your computer is using Mac OS X 10.5 and up.
- Check that your computer has Android File Transfer installed and open.
- Restart your computer.
- Troubleshoot your phone
- Troubleshoot your USB connections
- Try a different USB cable. Not all USB cables can transfer files.
- To test the USB port on your phone, connect your phone to a different computer.
- To test the USB port on your computer, connect a different device to your computer.
Related articles
Download your Currents data
You can export and download your Currents data, including your Currents circles, Communities, Streams, and Likes.
Note: Downloading your Currents data does not delete your Currents profile. Learn how to delete your Currents profile.
Download all your Currents data
You can download an archive of all your Currents data at once, including your Currents circles, Communities, Streams, and Likes. Your Currents archive includes your photos and videos from Currents.
- Go to the Download your data page. You might have to sign in. Your available Currents data will be preselected.
- Click Next.
- Choose a file type.
- Choose how you want your data delivered.
- Click Create archive.
Download specific Currents data
Instead of downloading all of your data, you can download specific Currents data, like your photos, posts, communities, or events.
Important: If you want to download your photos and videos from Currents, make sure to select Photos under "Currents Stream."
- Go to the Download your data page. You might have to sign in.
- Next to the type of content you want to download, like Currents Stream, click the Down arrow
.
- Click Select specific data.
- Select the specific data you want to download.
- Click OK.
- Click Next.
- Choose a file type.
- Choose how you want your data delivered.
- Click Create archive.
Note: If you want to download Currents Pages content, sign in as the Currents Page.
Save your photos and videos
Step 1: Download your photos and videos
- Go to the Download your data page. You might have to sign in.
- To download your photos and videos from Currents, make sure that "Currents Stream" is selected, click on "All Currents Stream data included" and make sure the Photos option is selected.
- Click Next Step.
- Choose a file type. Choose how you want your data delivered.
- Click Create archive.
Note: Your archive may take minutes or days before it’s available.
Step 2: Save your photos and videos
For best results, follow these steps on a computer:
- When your content is ready to download, you’ll get an email.
- Open the email and click Download archive.
- Sign in to your Google Account.
- Next to your archive, click Download.
- On your computer, go to the downloads folder, and open the file. Your photos will be in the "Photos" folder inside the "Currents Stream" folder that appears.
Optional: How to upload your content to Google Photos
After you download your photos to your device, you can store them on your device or upload them to Google Photos or another photo service.
There are 2 ways to back up your phone, camera, or storage card from your computer to Google Photos:
- Install Backup and Sync.
- Upload photos from your browser.
Learn how to back up photos to Google Photos.
Download Currents data for deleted Currents accounts
If you previously deleted your Currents account or your Currents page, we informed you that your photos and videos from Currents would continue to appear in your Album Archive and your Currents Events content wouldn’t be deleted. We will begin deleting this content on April 2, 2019. If you want to keep this content, download it using the above instructions before April 2019. Note: Photos and videos backed up in Google Photos will not be deleted.
Learn about types of Currents content you can download
To download content you created in Currents, like photos, events, and posts, select Currents Stream. You will get:
- Posts you created, including comments, Likes, and other activity
- Collections you created
- Tags you follow
- Photos you shared in your posts and comments
Currents circles
To download your circles data, select Currents circles. You will get:
- First names
- Last names
- Nicknames
- Display names
- Currents profile URLs
Currents Communities
To download data for Communities where you’re an owner or moderator, select Currents Communities. You will get:
- Names and links to Currents profiles of community owners, moderators, members, applicants, banned members, and invitees
- Links to posts shared with the community
- Community metadata, including community picture, community settings, content control settings, your role, and community categories
For public communities, you will also be able to download additional details including author, body, and photos for every community post.
Android Archiving and Publishing Made Easy

James
September 27th, 2016
With the release of Xamarin for Visual Studio 4.2 and this week’s Service Release 0, archiving and publishing your Android applications directly from Visual Studio just got a whole lot easier and more streamlined. The new Archive Manager inside of Visual Studio enables you to easily package, sign, and directly ship your Android apps for Ad-Hoc and Google Play distribution.
Archiving and Packaging
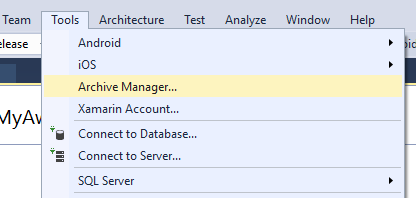
Creating your first archive for distribution is as easy as right-clicking on your Android project and selecting Archive, or bring up the Archive Manager from the Tools menu:
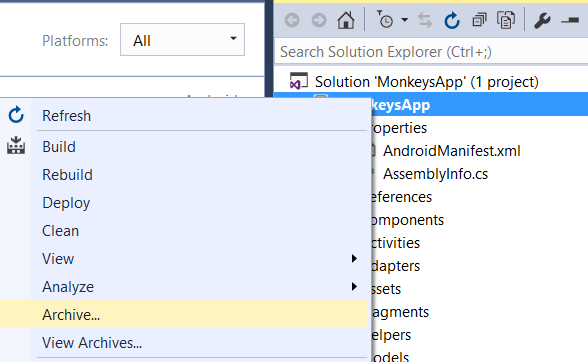
This will automatically build your Android application, create an APK using the version name and code from your Android Manifest, and create the first Archive. This Archive is in a pre-release state that allows you to write release notes, check app size, browse app icons, and distribute your application.
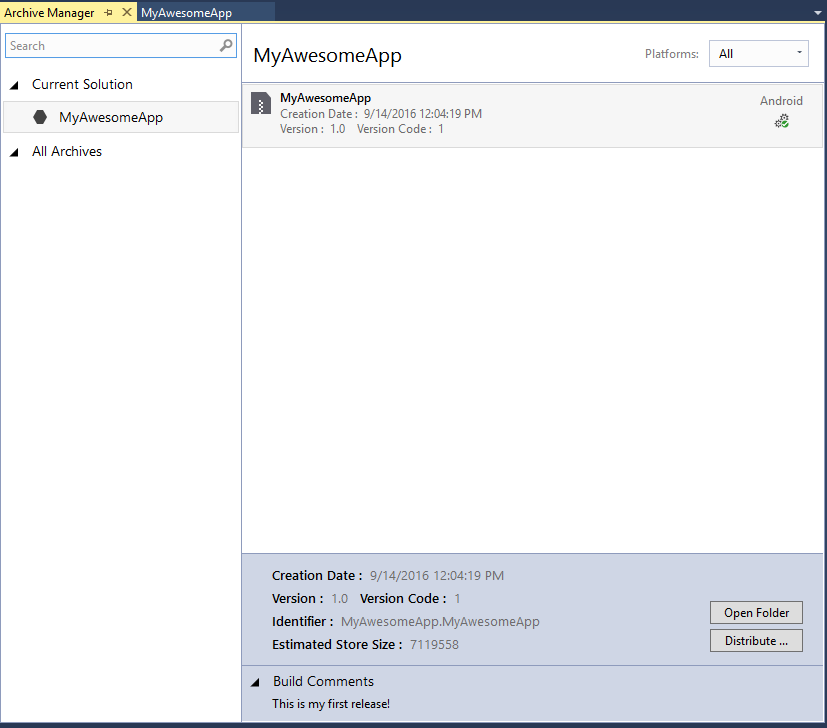
Distributing the App Ad-Hoc
Clicking on the Distribute… button will open the new Distribute workflow automatically in Ad-Hoc mode and will enable us to create, import, and store a keystore that will be used for signing the package.
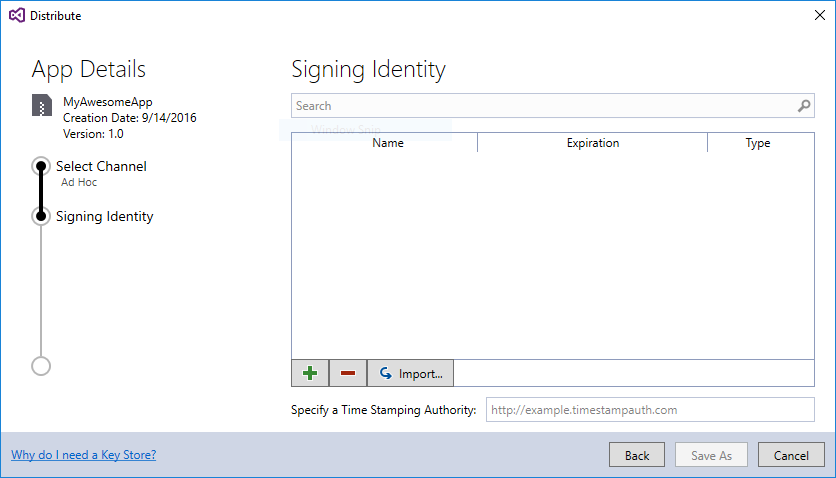
Since this is our first project, we can create a new keystore and fill in the required fields. Once this is done, or if we are importing an existing keystore, it will be saved in secure storage so I can easily sign my applications in the future without having to search my machine for it.

Now, we can use the keystore by tapping on it and then click Save As, which will sign the app and allow us to save it to disk, which we can then send to a distribution service such as HockeyApp.
Distributing to Google Play
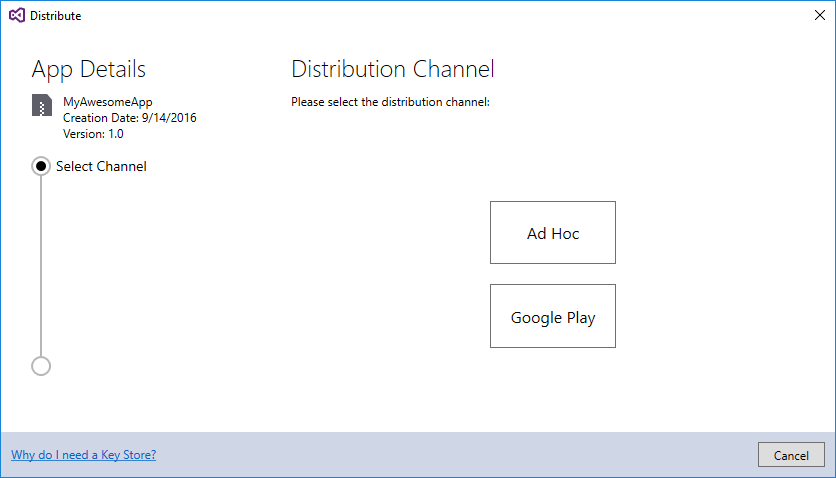
While we are often creating development and test builds, there are times we may want to publish directly to Google Play for production, which the Archive Manager also enables us to do during the distribution flow. Assuming that we have already created our app inside of the Google Play developer console and that we have turned on Alpha or Beta testing and published at minimum one release, back in the Archive Manager, select an archive to distribute and then click on the Distribute… button. This brings up an Ad-Hoc distribution flow, but we can click the back button and will then see an option for Google Play distribution:
Selecting Google Play will bring us back to our keystore selection to sign the app, but this time we’ll see that there is a new Continue button that will allow us to add our Google Play account when clicked.
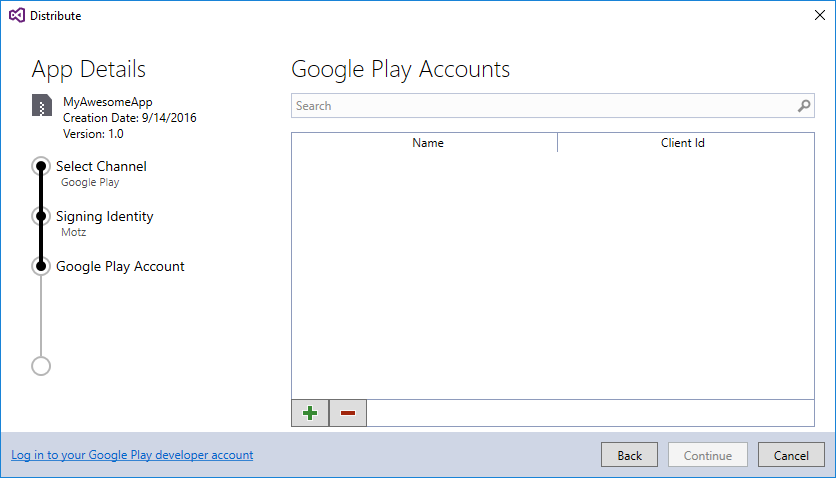
To set up a Google Play API, it’s as easy as signing into our Google Play developer account, going to API Access in settings, and creating a new OAuth Client. This will give us our Client Id and Client Secret to enter into the dialog.

Click Register to finish registration, which will launch a web browser to finalize the oAuth flow to add your account. 
Once the account is registered we can select it and continue to selecting a distribution channel to publish our application in: 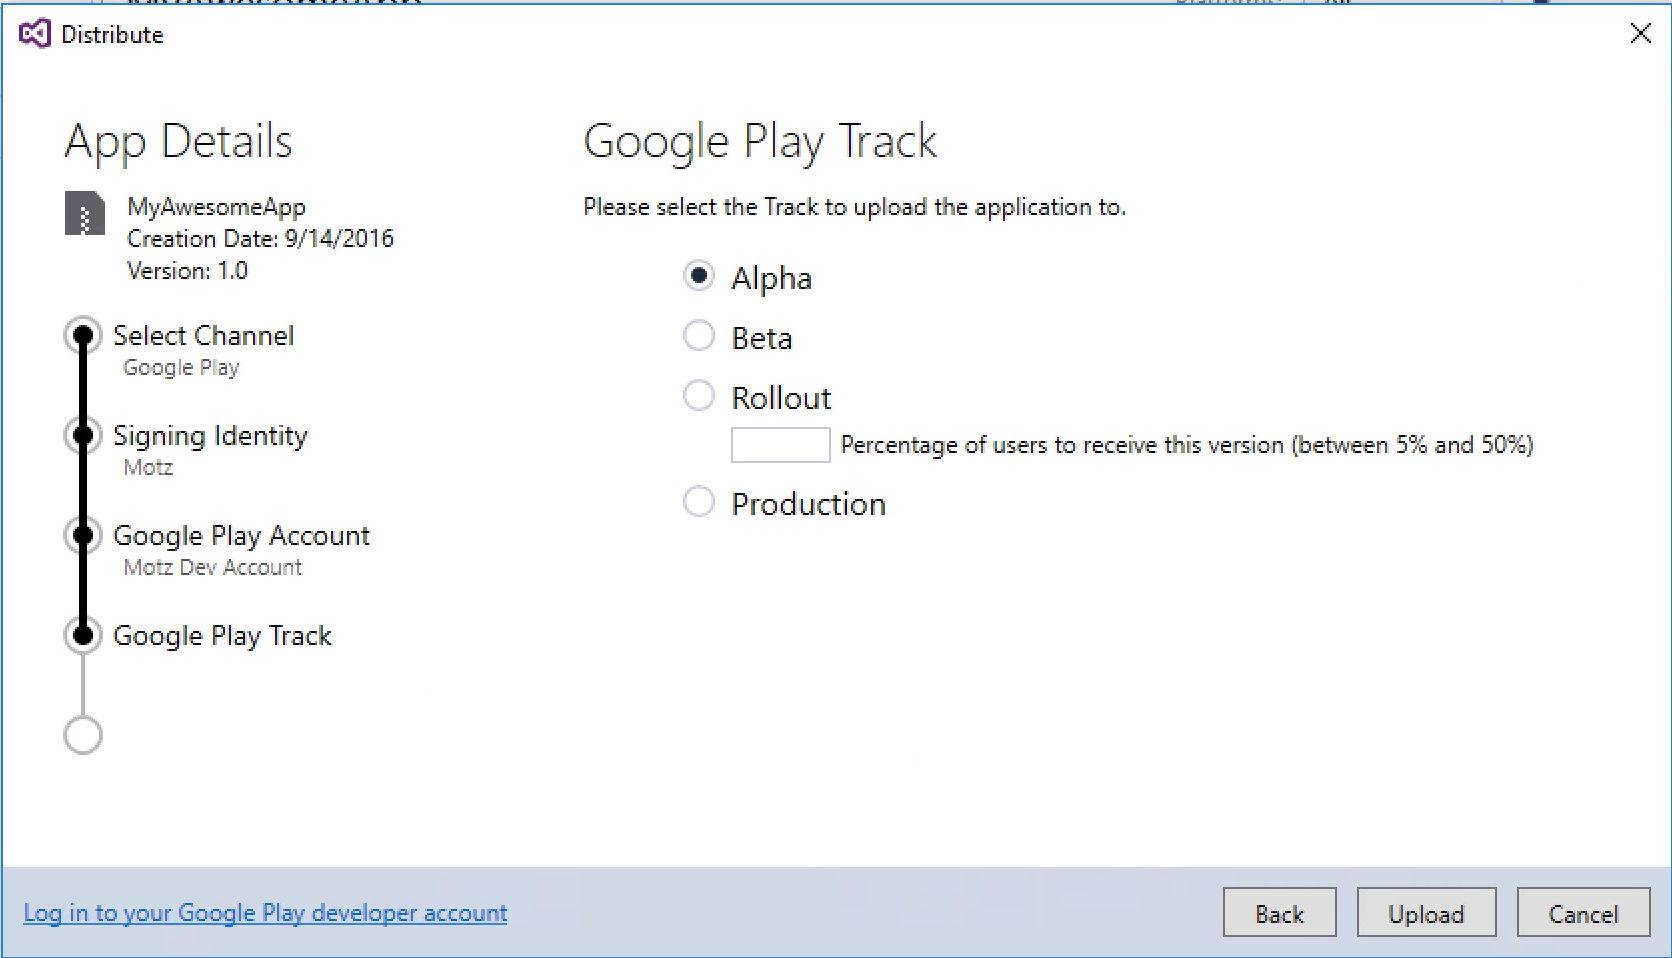
There you have it: now you can create a keystore, package an Android app for Ad-Hoc distribution, and take it all the way to production on Google Play without ever leaving Visual Studio!
Learn More
To learn more about preparing an Android application for release, be sure to read through our full documentation. You can find an in-depth overview of each step of the archiving and publishing process for both Visual Studio and Xamarin Studio in our documentation for Ad-Hoc and Google Play distribution.
What’s New in the Google Play For Windows Archives?
Screen Shot

System Requirements for Google Play For Windows Archives
- First, download the Google Play For Windows Archives
-
You can download its setup from given links:

Google Play For Windows Archives & PC Free Download

Google Play For Windows Archives& for Laptop
